


How to add tokens to MetaMask?
Adding tokens to your MetaMask wallet is a simple process that allows you to store and manage a wide variety of digital assets.
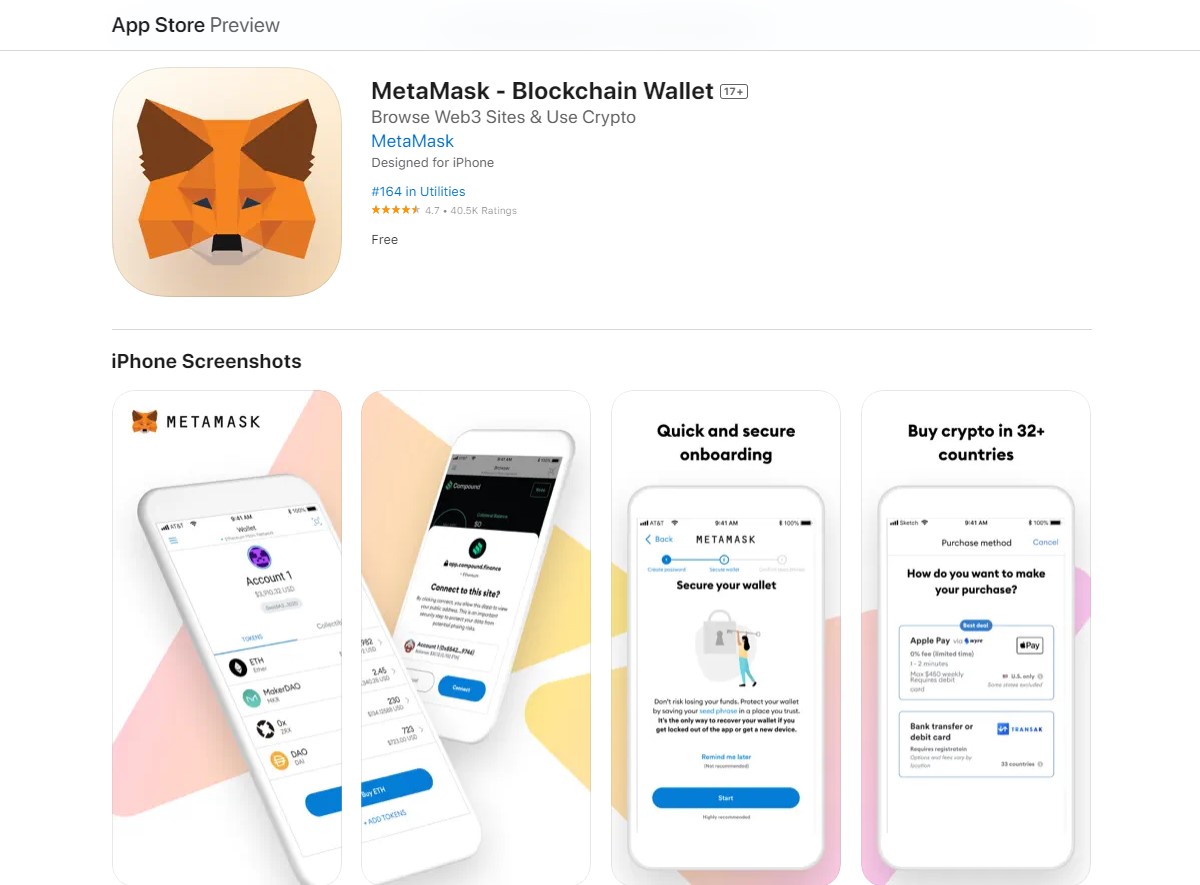
MetaMask is a popular browser extension wallet that supports Ethereum and ERC-20 tokens.
By adding tokens to your MetaMask wallet, you can easily view your balances, send and receive tokens, and participate in decentralized finance (DeFi) applications.
To add tokens to your MetaMask wallet, you can follow a few simple steps.
First, open the MetaMask extension and navigate to the main account page.
From there, click on the “Assets” tab and select “Add Token” at the bottom of the page.
You can then search for the token you want to add by entering its contract address, symbol, or name.
If the token is not listed, you can also add it manually by entering its contract address, decimal places, and symbol.
By adding tokens to your MetaMask wallet, you can easily manage your digital assets in one place.
Whether you are looking to store, send, or receive tokens, MetaMask provides a user-friendly interface that makes it easy to manage your crypto portfolio.
With the ability to add custom tokens, MetaMask offers flexibility and convenience for users who want to manage a wide variety of digital assets.
Post Contents
- 1 Setting Up Metamask Wallet
- 2 Understanding Tokens in MetaMask
- 3 How to Add Tokens to Metamask
- 4 Importing Tokens into Metamask
- 5 Using Etherscan for Token Information
- 6 Checking Token Balance
- 7 Managing Tokens in MetaMask
- 8 Using Metamask on Mobile
- 9 Understanding Network and Blockchain
- 10 Trading and Transferring Tokens
- 11 Exploring DeFi and NFTs with Metamask
- 12 Other Relevant Platforms and Tokens
- 13 Key Takeaways
Setting Up Metamask Wallet
If you’re new to Metamask, getting started is easy.
First, you’ll need to install the Metamask browser extension on your preferred browser.
Once installed, you can create a new account or import an existing one.
To create a new account, click on the Metamask icon in your browser and follow the prompts to set up a new wallet.
Be sure to write down your seed phrase and keep it somewhere safe.
Your seed phrase is the only way to recover your wallet if you lose access to your device.
If you already have a Metamask account, you can import it by clicking on the Metamask icon and selecting “Import Account.
Enter your seed phrase and follow the prompts to import your account.
Once you have set up your account, you can start adding tokens to your wallet.
Metamask allows you to add both ERC-20 tokens and custom tokens.
To add an ERC-20 token, simply search for the token in the Metamask search bar and click “Add.”
Metamask will automatically detect the token and add it to your wallet.
To add a custom token, you’ll need to enter the token contract address manually.
Click on “Add Token” and enter the token contract address, token symbol, and decimal places.
Once you’ve entered the information, click “Add” to add the token to your wallet.
That’s it!
You’re now ready to start using your Metamask wallet to store and manage your tokens.
Understanding Tokens in MetaMask
If you are new to MetaMask, you may be wondering what tokens are and how they work in the wallet.
Tokens are digital assets that exist on the Ethereum blockchain.
They can represent anything from cryptocurrencies to loyalty points, and they are typically created using the ERC-20 standard.
When you add a token to your MetaMask wallet, you are essentially telling the wallet to track that asset for you.
This means that you can see your token balance, send and receive tokens, and view your transaction history all within MetaMask.
MetaMask comes pre-loaded with a list of popular tokens, but you can also add custom tokens to the wallet.
To add a custom token, you will need to know the token’s contract address, symbol, and decimal places.
You can usually find this information on the token’s website or in a token explorer.
Once you have this information, you can add the token to MetaMask by clicking on the “Add Token” button and entering the details.
MetaMask will then display your token balance alongside your other assets.
It’s important to note that not all tokens are ERC-20 tokens.
Some tokens may use a different standard, which means that they may not be compatible with MetaMask.
However, most tokens that you will encounter are ERC-20 tokens, which means that they should work seamlessly with MetaMask.
How to Add Tokens to Metamask
Adding tokens to your Metamask wallet is a simple process that can be completed in a few easy steps.
Here’s how you can do it:
- Open your Metamask wallet and go to the account page.
- Click on the “Assets” tab at the bottom of the page.
- Click on the “Add Token” button.
- In the search bar, type the name or symbol of the token you want to add.
- If the token is not automatically detected, you will need to enter the token contract address manually. You can find the contract address on the token’s website or on a block explorer like Etherscan.
- Once you have entered the contract address, click “Next” and then “Add Tokens”.
- The token will now appear in your Metamask wallet.
It’s important to note that not all tokens are supported by Metamask.
Only tokens that are built on the Ethereum network and follow the ERC-20 standard can be added to your wallet.
If you want to remove a token from your wallet, simply click on the three dots next to the token and select “Hide Token”.
By following these steps, you can easily add new tokens to your Metamask wallet and manage your crypto assets in one convenient location.
Importing Tokens into Metamask
Adding tokens to your Metamask wallet is a straightforward process.
Here’s how you can import tokens into your Metamask wallet:
- Open your Metamask wallet and go to the account page.
- Click on the “Add Token” button at the bottom of the page.
- Type in the name or symbol of the token you wish to import into the search bar. If the token is not automatically detected, you’ll need to enter the token’s contract address manually.
- Once you’ve entered the token’s contract address, click on “Next.”
- Metamask will automatically fill in the token’s symbol and decimal places. Click on “Add Tokens” to complete the process.
It’s important to note that you won’t be able to import a token into Metamask unless you hold it in one of your connected accounts.
Additionally, make sure that you’re connected to the correct Ethereum mainnet when importing tokens.
Importing tokens into Metamask is a great way to keep track of all your assets in one place.
With just a few clicks, you can easily manage your cryptocurrency holdings and stay on top of the market.
Using Etherscan for Token Information
Etherscan is a popular blockchain explorer that can be used to find information about tokens.
Here’s how to use it to get the information you need to add a token to your MetaMask wallet:
- First, go to Etherscan and search for the token you want to add. You can search by the token symbol or the contract address.
- Once you’ve found the token, look for the “Contract” section on the token’s page. Here, you’ll find important information about the token, including its contract address and decimal value.
- The contract address is a long string of characters that uniquely identifies the token on the Ethereum blockchain. You’ll need to copy this address to add the token to your MetaMask wallet.
- The decimal value tells you how many decimal places the token uses. This is important to know when adding the token to MetaMask, as you’ll need to enter this value correctly.
- Once you have the contract address and decimal value, you’re ready to add the token to your MetaMask wallet. Simply open MetaMask, go to the “Assets” tab, and click “Add Token.” Enter the contract address and decimal value, and the token should appear in your wallet.
Using Etherscan to find token information is a quick and easy way to add new tokens to your MetaMask wallet.
With just a few clicks, you can find the information you need to add any ERC-20 token to your wallet.
Checking Token Balance
Once you have added your tokens to MetaMask, you will want to check your token balance.
Checking your token balance is easy to do and can be done in just a few steps.
First, open your MetaMask wallet and click on the “Assets” tab.
Here, you will see a list of all the tokens you have added to your wallet.
To check your token balance, simply look for the token you want to check and you will see the balance displayed next to the token name.
If you have multiple tokens, you can easily scroll through the list to find the one you want to check.
If you want to see more details about your token balance, you can click on the token name.
This will open up a new page where you can see the token’s balance, as well as other information such as the token’s contract address and symbol.
It’s important to note that your token balance may not be displayed immediately after adding a new token to your wallet.
This is because MetaMask needs to sync with the blockchain to update your balance.
If you don’t see your token balance right away, don’t worry, it should update soon.
Managing Tokens in MetaMask
Adding tokens to your MetaMask wallet is a great way to keep track of your assets.
However, it’s important to know how to manage your tokens so that you can keep your wallet organized and clutter-free.
Here are some tips on how to manage your tokens in MetaMask:
Hiding Tokens
If you have tokens in your wallet that you no longer want to see, you can hide them.
To do this, simply click on the token you want to hide and select “hide token” from the drop-down menu.
The token will no longer be visible in your wallet, but you can always unhide it later if you change your mind.
Custom Tokens
If you have a token that is not listed in the MetaMask token list, you can add it as a custom token.
To do this, click on “add token” and enter the token’s contract address, symbol, and decimal places.
Once you have added the token, it will appear in your wallet like any other token.
Automatic Token Detection
MetaMask has a feature that automatically detects tokens held by your address and adds them to your wallet.
This feature is enabled by default, but you can turn it off if you prefer.
To do this, click on the three dots next to the token list and select “settings”.
From there, you can toggle the “automatic token detection” option on or off.
Token Detection
While MetaMask does automatically detect some tokens, it’s impossible for it to keep up with every possible token out there.
If you have a token that is not automatically detected, you will need to add it manually as a custom token.
Managing your tokens in MetaMask is easy once you know how.
By hiding tokens, adding custom tokens, and managing automatic token detection, you can keep your wallet organized and clutter-free.
Using Metamask on Mobile
If you prefer to use Metamask on your mobile device, you can easily add tokens to your wallet using the mobile app.
Here’s how you can do it:
- Download the Metamask mobile app on your iOS or Android device.
- Log in to your Metamask account.
- Tap on the “Assets” tab at the bottom of the screen.
- Tap on the “Add Token” button.
- Choose whether you want to add a token by searching for it or by manually entering the contract address.
- If you choose to search for the token, type in the name of the token you want to add and select it from the list of results.
- If you choose to manually enter the contract address, input the token’s contract address, symbol, and decimal places.
- Tap “Add” to add the token to your Metamask wallet.
Once you’ve added the token to your wallet, you can easily view your balance and transfer the tokens to other wallets or exchanges.
Just make sure you have enough ETH in your wallet to cover the gas fees for the transaction.
Understanding Network and Blockchain
When it comes to adding tokens to MetaMask, it’s important to first understand the concepts of network and blockchain.
A network is a group of computers that are connected to each other and share information.
In the context of blockchain, a network is a group of computers that work together to maintain a shared ledger of transactions.
A blockchain is a type of distributed ledger technology that is used to record transactions.
It is called a “chain” because each block of transactions is linked to the previous block, creating a chain of blocks.
This makes it very difficult for anyone to alter the ledger without being detected.
Ethereum Name Service (ENS) is a decentralized domain name service built on the Ethereum blockchain.
It allows users to register human-readable domain names and associate them with Ethereum addresses.
When you add a network to MetaMask, you are essentially connecting to a specific blockchain.
This allows you to interact with that blockchain and perform transactions.
MetaMask supports a variety of networks, including the Ethereum mainnet, various testnets, and custom networks.
To add a network to MetaMask, you can either use the “Add Network” button in the Networks section of the settings, or you can manually enter the network details.
When adding a custom network, it’s important to verify the information to ensure that it’s accurate and trustworthy.
Once you have connected to a network, you can then add tokens to your MetaMask wallet.
MetaMask automatically detects tokens held by your address and adds them to your wallet.
However, if you want to add a token that is not listed, you can do so by manually entering the token details.
Trading and Transferring Tokens
Once you have added tokens to your MetaMask wallet, you can start trading and transferring them.
Here’s how:
Buying and Selling Tokens
To buy or sell tokens, you’ll need to use a decentralized exchange (DEX) such as Uniswap or Sushiswap.
These exchanges allow you to trade tokens directly from your MetaMask wallet without the need for a centralized exchange.
To buy tokens, you’ll need to have some ETH in your MetaMask wallet to pay for the transaction fees.
Once you have ETH, you can navigate to the DEX of your choice, connect your MetaMask wallet, and select the token you want to buy.
You can then enter the amount of ETH you want to spend and the DEX will automatically calculate the amount of tokens you’ll receive.
To sell tokens, the process is similar.
You’ll need to navigate to the DEX, select the token you want to sell, and enter the amount you want to sell.
The DEX will then automatically calculate the amount of ETH you’ll receive.
Transferring Tokens
To transfer tokens to another wallet, you’ll need to know the recipient’s wallet address.
Once you have their address, you can navigate to your MetaMask wallet, select the token you want to transfer, and enter the recipient’s address.
You’ll also need to enter the amount of tokens you want to transfer and pay the transaction fee in ETH.
Once you’ve confirmed the transaction, you’ll receive a transaction hash that you can use to track the status of the transfer.
Keeping Track of Transactions
MetaMask keeps a record of all your transactions, including buys, sells, trades, and transfers.
You can view your transaction history by navigating to the “Activity” tab in your MetaMask wallet.
Each transaction will have a unique transaction hash that you can use to track the status of the transaction on the Ethereum blockchain.
You can use a blockchain explorer such as Etherscan to view the details of the transaction, including the amount of tokens transferred and the transaction fee paid.
Exploring DeFi and NFTs with Metamask
If you’re new to the world of DeFi and NFTs, you might be wondering how to get started.
Luckily, with the help of Metamask, exploring these exciting new areas of the crypto world is easier than ever before.
Metamask is a browser extension that allows you to easily interact with decentralized applications (dApps) on the Ethereum network.
With Metamask, you can manage your Ethereum wallet, send and receive Ether, and even interact with smart contracts.
One of the most exciting aspects of Metamask is its support for DeFi applications.
DeFi, or decentralized finance, is a rapidly growing area of the crypto world that allows users to access financial services without the need for traditional intermediaries like banks.
With Metamask, you can easily connect to DeFi protocols like Uniswap, Aave, and Compound, and start earning interest on your crypto holdings.
But that’s not all! Metamask also supports NFTs, or non-fungible tokens.
NFTs are unique digital assets that are stored on the Ethereum blockchain, and they’re becoming increasingly popular in the world of art, music, and gaming.
With Metamask, you can easily buy, sell, and trade NFTs on popular marketplaces like OpenSea and Rarible.
So, whether you’re interested in DeFi, NFTs, or both, Metamask is the perfect tool to help you explore these exciting new areas of the crypto world.
With its user-friendly interface and powerful features, Metamask makes it easy to get started and start exploring all that the Ethereum network has to offer.
Other Relevant Platforms and Tokens
In addition to the popular tokens and platforms mentioned earlier, there are several other relevant platforms and tokens that you might want to add to your MetaMask wallet.
Here are a few examples:
- Coinbase: Coinbase is a popular cryptocurrency exchange that allows you to buy, sell, and store a wide variety of cryptocurrencies. If you have a Coinbase account, you can easily transfer your tokens to your MetaMask wallet.
- CoinMarketCap: CoinMarketCap is a website that provides information on the prices, market capitalizations, and trading volumes of various cryptocurrencies. If you’re interested in keeping track of the value of your tokens, you can use CoinMarketCap to monitor their prices and add them to your MetaMask wallet.
- BNB: Binance Coin (BNB) is the native token of the Binance cryptocurrency exchange. If you frequently use Binance to trade cryptocurrencies, you might want to add BNB to your MetaMask wallet.
- WETH: Wrapped Ether (WETH) is an ERC20 token that represents Ether on the Ethereum blockchain. If you want to trade Ether-based tokens on decentralized exchanges (DEXs) like Uniswap, you’ll need to convert your Ether to WETH first.
- Polygon: Polygon (formerly known as Matic Network) is a Layer 2 scaling solution for Ethereum that aims to improve the speed and cost of transactions. If you frequently use DEXs or other Ethereum-based applications, you might want to add Polygon to your MetaMask wallet.
- Chainlink: Chainlink is a decentralized oracle network that provides data to smart contracts on various blockchains. If you’re interested in using smart contracts that rely on external data sources, you might want to add Chainlink to your MetaMask wallet.
- Smart Chain: Binance Smart Chain (BSC) is a blockchain that is compatible with the Ethereum Virtual Machine (EVM) and supports the same tools and infrastructure as Ethereum. If you frequently use BSC-based applications, you might want to add Smart Chain to your MetaMask wallet.
- BscScan: BscScan is a block explorer for the Binance Smart Chain that allows you to view transaction histories, balances, and other information related to BSC-based tokens. If you frequently use BSC-based applications, you might want to use BscScan to monitor your tokens and add them to your MetaMask wallet.
By adding these tokens and platforms to your MetaMask wallet, you can easily manage and access your cryptocurrencies from one convenient location.
Key Takeaways
Adding tokens to your MetaMask wallet is a simple process that can be done in just a few steps.
Here are some key takeaways to keep in mind:
- MetaMask does not automatically detect and add every possible token to your wallet. You will need to manually add any tokens that you want to use or hold.
- There are two ways to add tokens to your MetaMask wallet: by importing them using their contract address, or by searching for them in the MetaMask token list.
- To import a token using its contract address, you will need to have the token’s contract address and decimals. Once you have this information, you can add the token by clicking on the “Add Token” button in your MetaMask wallet and entering the token’s details.
- To add a token using the MetaMask token list, you can search for the token by name or symbol. If the token is not listed, you can add it by clicking on the “Custom Token” button and entering the token’s contract address and decimals.
- Once you have added a token to your MetaMask wallet, you will be able to see your balance and transaction history for that token. You can also use the token to send and receive payments, trade on decentralized exchanges, and more.
- It’s important to keep your MetaMask wallet secure by protecting your wallet address and private keys. You can do this by using a strong password, enabling two-factor authentication, and keeping your desktop and browser up-to-date with the latest security patches.
By following these steps and best practices, you can add new tokens to your MetaMask wallet and start using them to manage your cryptocurrency portfolio.