


How to delete a Facebook group?
Are you tired of managing a Facebook group that no longer serves its purpose?
Deleting a Facebook group can be a simple and straightforward process, but it’s important to do it correctly to avoid any confusion or mistakes.
In this article, we will guide you through the steps to delete a Facebook group, whether you’re using a web browser or the Facebook mobile app.
To delete a Facebook group, you will need to have admin access.
If you’re the only admin, you will need to add another member as an admin before you can delete the group.
Once you have the necessary permissions, you can proceed with deleting the group.
We will provide you with step-by-step instructions on how to delete a Facebook group, as well as how to archive a group if you’re not quite ready to delete it yet.
Post Contents
Understanding Facebook Groups
Facebook Groups are online communities where people with common interests, opinions, and objectives come together to share and discuss relevant content.
These groups can be public, private, or secret, depending on the privacy settings chosen by the group administrator.
Groups can be created for various purposes, such as organizing events, supporting a cause, or discussing a particular topic.
Groups can also be used for business purposes, such as promoting a product or service or building a community around a brand.
Facebook Pages, on the other hand, are generally created for businesses, product brands, celebrities, politicians, NGOs, and other public figures.
Pages allow businesses to connect with their audience and share information about their products or services.
Private groups, also known as closed groups, require approval from the group administrator before members can join.
Secret groups are not visible to non-members and require an invitation to join.
In Facebook Groups, members can share posts, photos, videos, and other types of content.
Members can also comment on posts and engage in discussions with other members.
Group administrators can moderate discussions and remove posts or members who violate the group’s rules.
Role of an Administrator
As an administrator of a Facebook group, you have a significant role in managing the group and ensuring that it functions properly.
This section will discuss the responsibilities of an admin and how to become one.
Admin Responsibilities
As an admin, you have the power to manage group settings, approve or deny membership requests, remove and block people from the group, posts, and comments on posts.
You are also responsible for enforcing the group’s rules and guidelines.
Here are some of the key responsibilities of an admin:
- Manage group settings such as the group name, privacy settings, cover photos, and more.
- Approve or deny membership requests or posts in the group.
- Remove and block people from the group, posts, and comments on posts.
- Enforce group rules and guidelines.
- Help resolve conflicts within the group.
- Keep the group active and engaged by posting relevant content and encouraging discussions.
How to Become an Admin
If you want to become an admin of a Facebook group, you need to be invited by the current admin or group owner.
You can also create your own group and become the admin.
Here are the steps to become an admin:
- Join a Facebook group or create your own.
- If you join a group, wait for the admin or group owner to invite you to become an admin.
- If you create your own group, you will automatically become the admin.
- Once you become an admin, you can manage the group and its settings.
In conclusion, being an admin of a Facebook group comes with significant responsibilities.
You have the power to manage the group, enforce rules, and keep the group active and engaged.
If you want to become an admin, you can join a group or create your own and wait for an invitation or become the admin of your own group.
How to Manage Members
Managing members in a Facebook group can be a daunting task, but with a few simple steps, you can easily add and remove members as needed.
Adding New Members
To add new members to your Facebook group, follow these steps:
- Go to your group’s page.
- Click on the “Members” tab at the top of the page.
- Click on the “Add Members” button in the upper right-hand corner.
- Enter the name or email address of the person you want to add.
- Click on the “Add” button.
Removing Members
If you need to remove a member from your Facebook group, you can do so by following these steps:
- Go to your group’s page.
- Click on the “Members” tab at the top of the page.
- Find the member you want to remove.
- Click on the three dots next to their name.
- Select “Remove from Group” from the dropdown menu.
It’s important to note that removing a member from your Facebook group will also remove all of their posts and comments from the group.
So, if you’re unsure whether you want to remove a member, you may want to consider temporarily suspending them instead.
By following these simple steps, you can easily manage the members in your Facebook group and keep your community running smoothly.
If you want to delete a Facebook group, you’ll need to navigate the Facebook app.
Here’s how to do it on both the mobile app and the web browser version.
Using the Mobile App
To delete a Facebook group using the mobile app, follow these steps:
- Open the Facebook app on your smartphone.
- Tap on the three horizontal lines in the top right corner of the screen.
- Scroll down and tap on “Groups.”
- Find the group you want to delete and tap on it to open it.
- Tap on the three dots in the top right corner of the screen.
- Tap on “Edit Group Settings.”
- Scroll down and tap on “Delete Group.”
- Confirm that you want to delete the group.
Using the Web Browser Version
To delete a Facebook group using the web browser version, follow these steps:
- Open your web browser and go to Facebook.com.
- Log in to your account.
- Click on “Groups” in the left-hand column.
- Find the group you want to delete and click on it to open it.
- Click on the three dots in the top right corner of the screen.
- Click on “Edit Group Settings.”
- Scroll down and click on “Delete Group.”
- Confirm that you want to delete the group.
Whether you’re using the mobile app or the web browser version, the steps to delete a Facebook group are straightforward.
Just make sure you’re certain you want to delete the group, as there’s no way to recover it once it’s been deleted.
How to Delete a Facebook Group
If you have a Facebook group that you no longer want to keep, you can easily delete it.
Here’s how to do it:
Archiving the Group
Archiving a group is a good option if you think you might want to use the group again in the future.
Archiving a group will make it inactive, but you can still access it and all its content.
Here’s how to archive a Facebook group:
- Go to the group you want to archive.
- Click on the three dots on the top right corner of the page.
- Select “Archive Group”.
- Confirm your choice by clicking “Archive”.
Permanently Deleting the Group
If you’re sure you want to delete the group and all its content permanently, here’s how to do it:
- Go to the group you want to delete.
- Click on the three dots on the top right corner of the page.
- Select “Manage Group”.
- Click on “Settings”.
- Scroll down to the bottom of the page and click on “Permanently Delete Group”.
- Confirm your choice by clicking “Delete”.
Note that once you delete a group, you won’t be able to get it back.
All the content in the group, including posts, comments, and files, will be permanently deleted.
Make sure you have a backup of any important content before deleting the group.
What Happens After Deleting a Group
Deleting a Facebook group can have various effects on the members, posts, and comments.
Here are some things to keep in mind when you delete a group.
Effects on Members
When you delete a group, all the members are automatically removed from the group.
They will no longer be able to access the group’s content or participate in any discussions.
If you are the only member of the group, the group will be deleted automatically.
Effects on Posts and Comments
All the posts and comments in the group will be permanently deleted once you delete the group.
This means that all the content, including photos and videos, will be lost forever.
Keep in mind that this action cannot be undone, so make sure you have a backup of any important information before you delete the group.
Additionally, if you leave a group before it is deleted, your comments and posts will still be visible to other members.
However, if you are the only member of the group and you leave it, the group will be deleted automatically.
Notifications
When you delete a group, all the members will be notified that the group has been deleted.
They will no longer receive any notifications from the group.
If you want to leave a group without notifying the members, you can simply leave the group without deleting it.
Additional Options
If you’re not quite ready to delete your Facebook group, there are a couple of other options available to you.
In this section, we’ll cover how to pause and resume a group, as well as some alternative options you may want to consider.
Pausing a Group
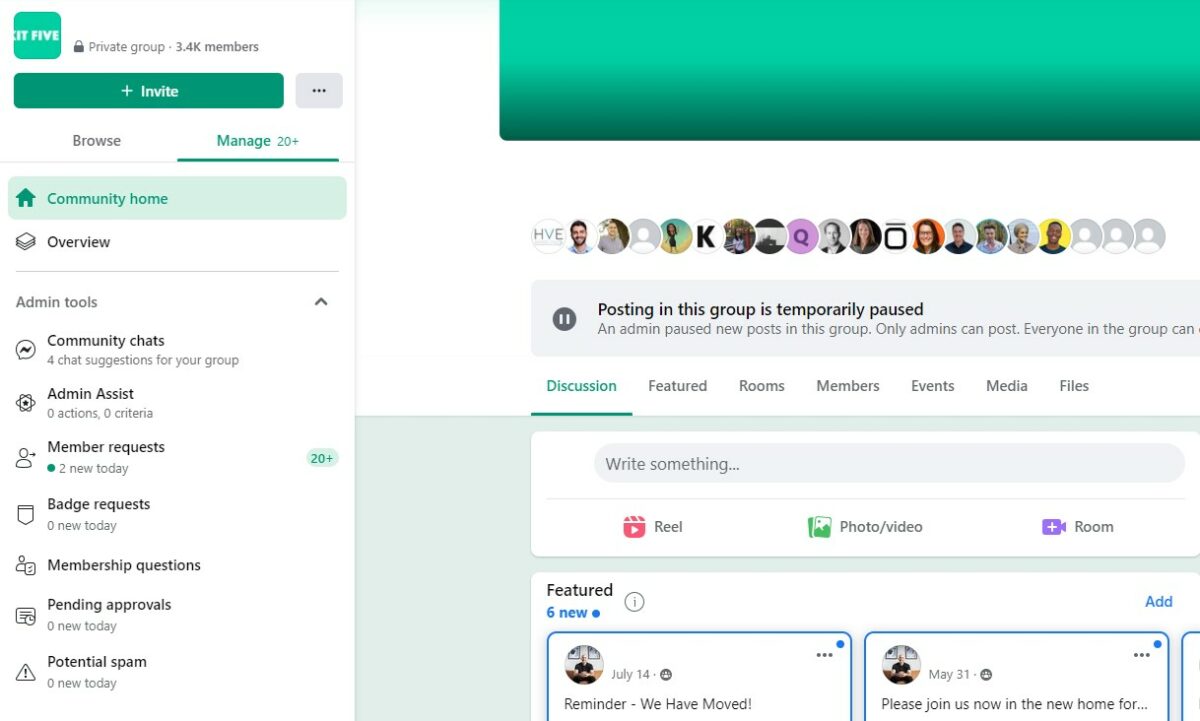
Sometimes you may want to temporarily pause your Facebook group without deleting it.
This can be useful if you’re taking a break from the group or if you want to limit activity for a short period of time.
Here’s how to pause your group:
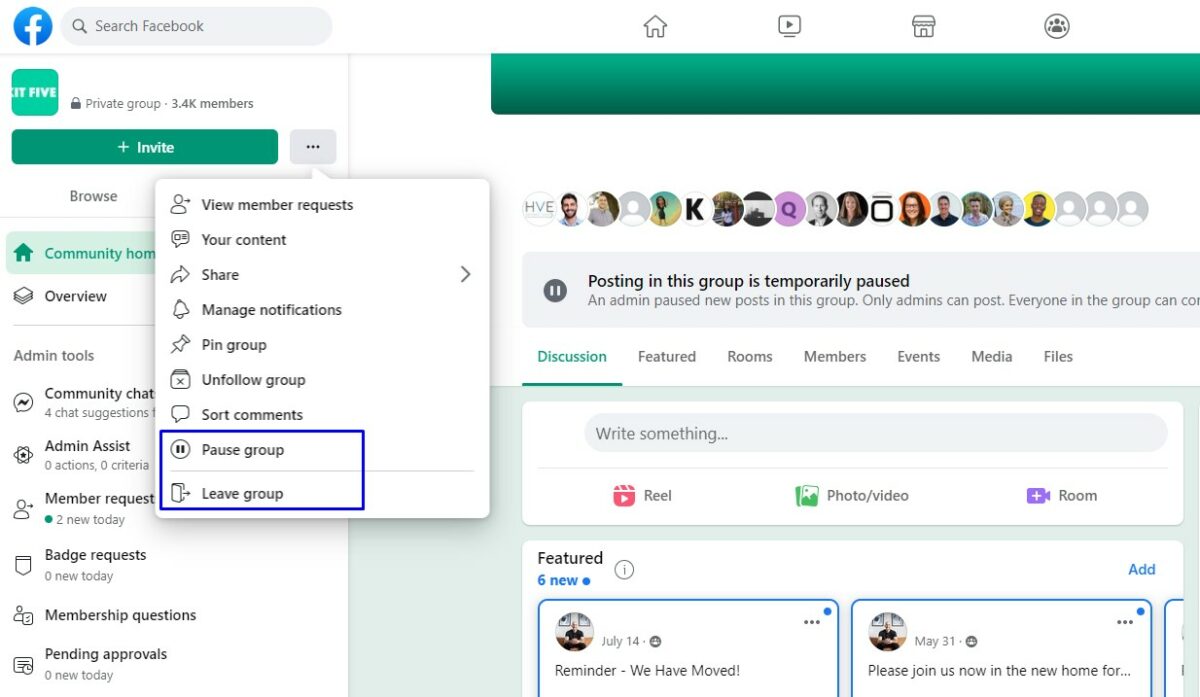
- Go to your group’s page and click on the three dots in the upper-right corner.
- Select “More” from the dropdown menu.
- Click on “Pause Group” and select the duration you want to pause the group for.
- Click “Confirm” to pause the group.
During the pause period, members won’t be able to post or comment in the group.
However, they will still be able to view the content.
Resuming a Group
To resume your paused group, simply follow these steps:
- Go to your group’s page and click on the three dots in the upper-right corner.
- Select “More” from the dropdown menu.
- Click on “Resume Group” to reactivate the group.
Once you resume the group, members will be able to post and comment again.
Alternatives
If you’re considering deleting your Facebook group, there are a few alternatives you may want to consider first.
For example, you could:
- Change the group’s privacy settings to make it more personal or exclusive
- Merge your group with another group to increase activity and engagement
- Archive the group to keep it visible but inactive
Before making any major changes to your group, take some time to consider your options and think about what’s best for your group’s members and your personal cause.
Key Takeaways
Deleting a Facebook group can be a straightforward process if you follow a few simple steps.
Here are some key takeaways to keep in mind:
- To delete a Facebook group, you need to be the group’s creator or an admin with the necessary permissions.
- You can delete a group either by removing all members and leaving the group, or by using the “Delete Group” option in the group’s settings.
- Before deleting a group, make sure to download any important data, such as posts or member information, that you want to keep.
- Deleting a group is permanent and cannot be undone, so make sure you really want to delete the group before proceeding.
To delete a Facebook group, follow these simple steps:
- Log in to Facebook and go to the group you want to delete.
- Click on the menu button (three horizontal lines) in the top right corner of the screen.
- Select “Groups” from the menu.
- Click on “Groups You Manage” on the left side of the screen.
- Find the group you want to delete and click on it.
- Click on “Members” or “People” at the top of the group, depending on whether the group is public or private.
- Remove each member from the group by clicking on the three dots next to their name and selecting “Remove Member” or “Ban from Group”.
- Once all members have been removed, click on “Leave Group” to leave the group yourself.
- Alternatively, if you are the group’s creator or an admin with the necessary permissions, you can click on “Delete Group” in the group’s settings.
Remember, before deleting a group, make sure to download any important data that you want to keep.
Once a group is deleted, it cannot be restored.