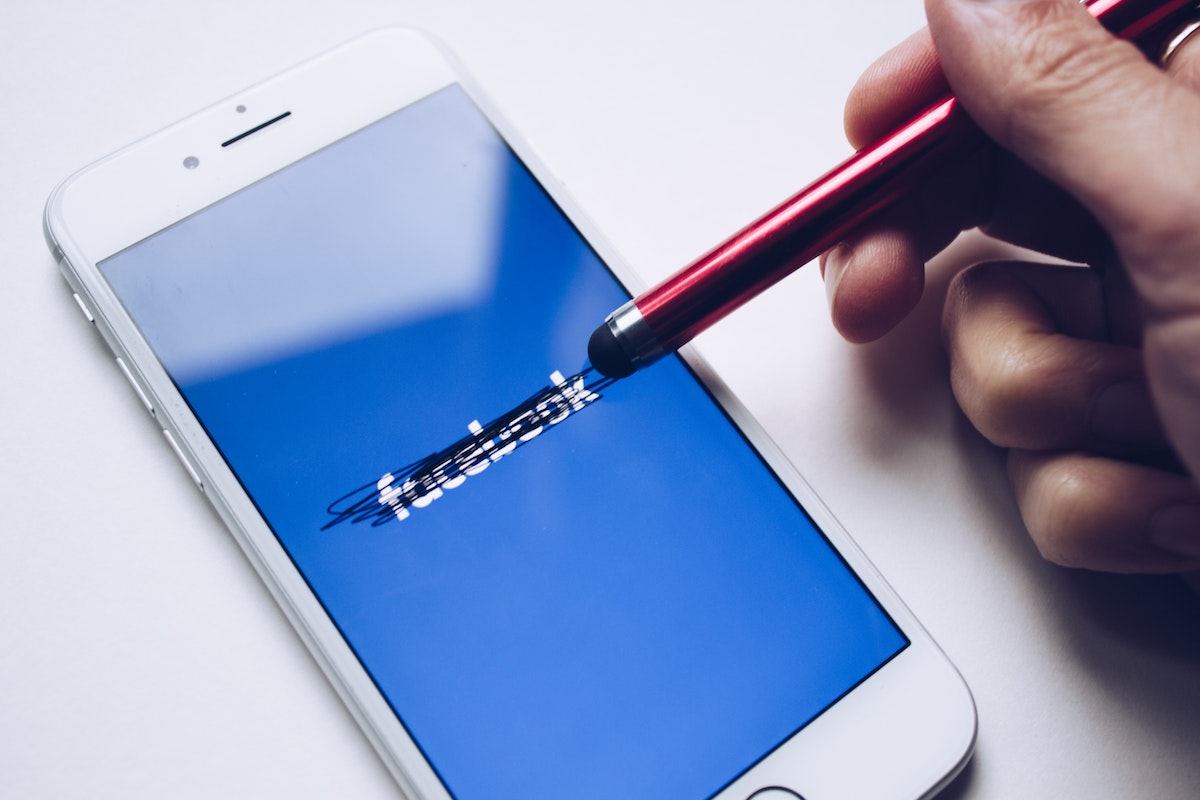


If you’re looking to take a break from social media or simply want to step away from Facebook for a while, deactivating your account may be a good option for you.
Deactivating your Facebook account is a simple process that can be done in just a few steps, but how to deactivate Facebook?
By deactivating your account, you’ll be able to take a break from Facebook without losing any of your data or information.
To deactivate your Facebook account, you’ll need to follow a few simple instructions.
First, log in to your account and navigate to your settings.
From there, you’ll be able to select the option to deactivate your account.
Once you’ve selected this option, you’ll be asked to confirm your decision and provide a reason for deactivating your account.
After that, your account will be deactivated and you’ll be able to step away from Facebook for as long as you like.
It’s important to note that deactivating your account is different from deleting it.
When you deactivate your account, your profile will be hidden from other users, but your data will still be stored on Facebook’s servers.
If you decide to return to Facebook in the future, you can reactivate your account and pick up where you left off. If you’re ready to take a break from Facebook, deactivating your account is a simple and easy way to do so.
Post Contents
Understanding Deactivation and Deletion
Deactivation Vs Deletion
Deactivating your Facebook account is a temporary measure that allows you to take a break from the social media platform.
When you deactivate your account, your profile, photos, videos, and posts are hidden from other users, but they are not deleted.
You can reactivate your account at any time by logging in again.
On the other hand, deleting your Facebook account is a permanent action that removes your profile, photos, videos, and posts from the platform.
Once you delete your account, you cannot reactivate it or retrieve any of the content you had on it.
What Happens When You Deactivate?
When you deactivate your Facebook account, the following things happen:
- Your profile, photos, videos, and posts are hidden from other users.
- Your name and profile picture will still be visible to your friends in their Friends list and in messages you have sent.
- You can still use Facebook Messenger to communicate with your friends.
- Your account information, such as your messages and photos, will still be visible to others who have access to them.
What Happens When You Delete?
When you delete your Facebook account, the following things happen:
- Your profile, photos, videos, and posts are permanently deleted from the platform.
- You cannot reactivate your account or retrieve any of the content you had on it.
- Your account information, such as your messages and photos, will be deleted from Facebook’s servers.
It is important to note that deactivating or deleting your account does not necessarily mean that all your information is gone forever.
Facebook may retain some of your data for legal or business reasons, such as to comply with a court order or to prevent fraud.
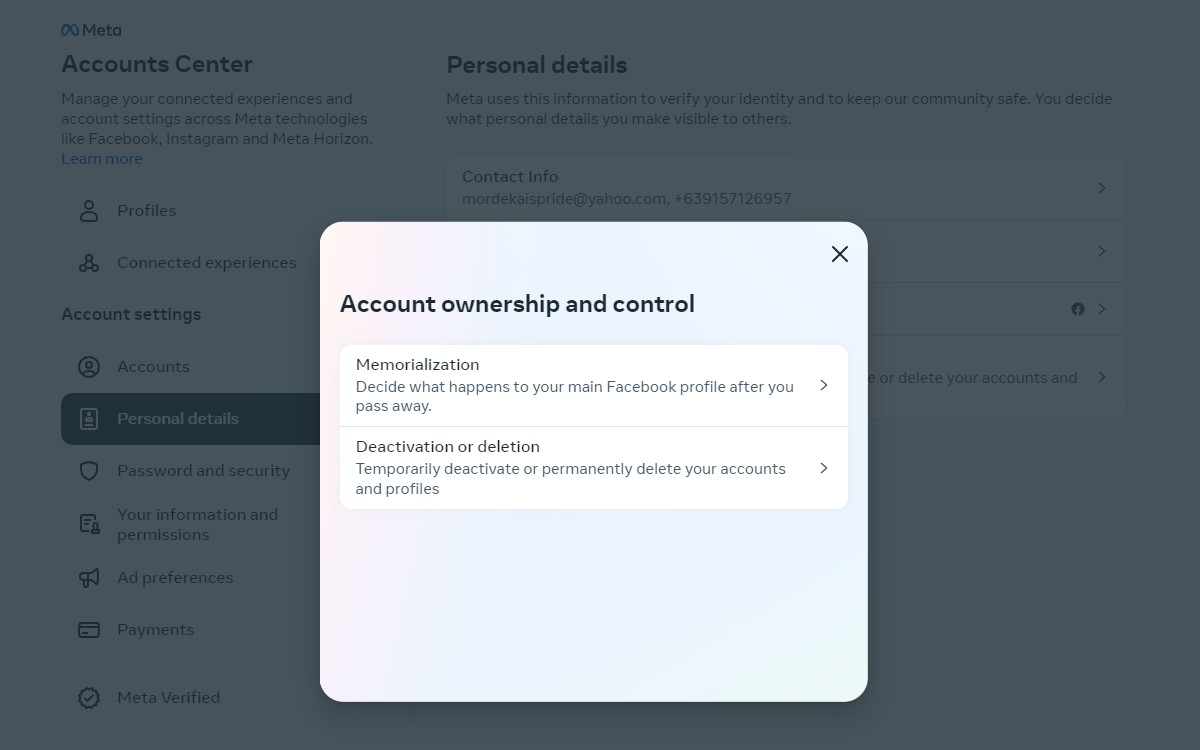
In order to deactivate or delete your account, you can go to the “Account Ownership and Control” section in your Facebook settings.
From there, you can select the option that best suits your needs.
How to Deactivate Facebook Account
If you’re looking to take a break from Facebook, you can temporarily deactivate your account.
This means that your profile, photos, and posts will be hidden from other users, but you can reactivate your account at any time by logging back in.
Here’s how to deactivate your Facebook account from your computer or mobile device.
From Computer
- Log in to your Facebook account on your computer.
- Click on the downward arrow in the top right corner of the page.
- Select “Settings & Privacy” and then click “Settings.”
- Click “Your Facebook Information” in the left-hand column.
- Click “Deactivation and Deletion.”
- Select “Deactivate Account” and then click “Continue to Account Deactivation.”
- Follow the prompts to confirm your decision to deactivate your account.
From Mobile
- Open the Facebook app on your mobile device.
- Tap on the three horizontal lines in the bottom right corner of the screen.
- Scroll down and tap on “Settings & Privacy.”
- Tap on “Settings.”
- Scroll down and tap on “Account Ownership and Control.”
- Tap on “Deactivation and Deletion.”
- Select “Deactivate Account” and then tap “Continue to Account Deactivation.”
- Follow the prompts to confirm your decision to deactivate your account.
Remember, deactivating your Facebook account is only temporary.
If you decide to come back to Facebook, you can reactivate your account at any time by logging back in.
What Remains Visible After Deactivation
When you deactivate your Facebook account, certain information may still be visible to others.
Here’s a breakdown of what remains visible after deactivation:
Profile and Posts
Your profile and posts will become invisible to others, but some information may still be visible to certain people.
For example, your name may still appear in someone else’s friend list, and they may still be able to see messages you sent them before deactivating your account.
However, your profile picture, cover photo, and other personal information will be hidden from others.
Messages and Chats
Your messages and chats will still be visible to the people you had conversations with.
However, your name will appear as “Facebook User” instead of your real name.
You won’t be able to access your messages or chats after deactivating your account, but the other person will still be able to see the conversation.
It’s important to note that deactivating your account is not the same as deleting your account.
If you want to permanently delete your account, you need to go through a separate process.
Deactivating your account is a temporary measure that allows you to take a break from Facebook without losing your data.
How to Reactivate Your Facebook Account
If you’ve previously deactivated your Facebook account and now want to reactivate it, you can do so easily.
Here’s how:
Reactivation Process
- Open your web browser and go to www.facebook.com.
- Enter your email address or phone number and password associated with your account.
- Click on the “Log In” button.
- You will be asked to confirm that you want to reactivate your account. Click on the “Reactivate” button.
- Follow the on-screen instructions to complete the reactivation process.
Regaining Access
If you don’t remember your Facebook password or don’t have access to the email address or phone number associated with your account, you can still regain access to your account by following these steps:
- Go to the Facebook login page and click on the “Forgot Password” link.
- Enter your email address or phone number associated with your account.
- Follow the on-screen instructions to reset your password.
- Once you have reset your password, follow the steps above to reactivate your account.
It’s important to note that when you reactivate your Facebook account, all of your previous account information will be restored.
This includes your friends, photos, and posts.
If you want to start fresh with a new account, you will need to create a new Facebook account.
How to Permanently Delete Your Facebook Account
If you want to permanently delete your Facebook account, you can do so from your computer or mobile device.
Here’s how:
From Computer
- Go to Facebook.com and log in to your account.
- Click on the down arrow at the top right of the screen and select “Settings”.
- Click on “Your Facebook Information” on the left-hand side of the screen.
- Click on “Delete Your Account and Information”.
- Click on “Delete Account”.
- Enter your password and click “Continue”.
- Click on “Delete Account” again.
From Mobile
- Open the Facebook app on your mobile device and log in to your account.
- Tap on the three horizontal lines at the bottom right of the screen.
- Scroll down and tap on “Settings & Privacy”.
- Tap on “Settings”.
- Scroll down and tap on “Your Facebook Information”.
- Tap on “Account Ownership and Control”.
- Tap on “Deactivation and Deletion”.
- Tap on “Delete Account”.
- Enter your password and tap “Continue”.
- Tap on “Delete Account” again.
It’s important to note that once you delete your Facebook account, it cannot be undone.
All of your photos, posts, and messages will be permanently deleted.
If you’re not ready to permanently delete your account, you can deactivate it instead.
Deactivating your account will hide your profile, but your information will still be saved in case you decide to reactivate it later.
To deactivate your account, follow the same steps as deleting your account, but select “Deactivate Account” instead of “Delete Account”.
Before You Deactivate or Delete
Before you deactivate or delete your Facebook account, there are a few things you should consider.
Taking these steps can help ensure that you don’t lose any important data, and that your privacy is protected.
Backup Your Data
Before you deactivate or delete your account, it’s a good idea to backup your Facebook information.
This includes things like photos, videos, and messages.
You can download a copy of your Facebook data by following these steps:
- Click the down arrow in the top right corner of Facebook and select Settings & Privacy.
- Select Settings.
- Click Your Facebook Information in the left column.
- Click Download Your Information.
- Select the data you want to include in your download.
- Choose the format of your download.
- Click Create File.
Once you’ve requested your download, Facebook will notify you when it’s ready.
You can then download your data and save it to your computer.
Review Privacy Settings
Before you deactivate or delete your account, it’s important to review your privacy settings.
This can help ensure that your personal information is protected.
Here are a few things to consider:
- Review your privacy settings: Make sure you understand who can see your posts, photos, and other information. You can adjust your privacy settings by clicking the down arrow in the top right corner of Facebook and selecting Settings & Privacy > Settings > Privacy.
- Remove personal information: Consider removing any personal information from your profile, such as your phone number or email address.
- Deactivate apps: If you’ve used Facebook to log in to other apps or websites, make sure to deactivate those connections before deactivating your account. You can do this by clicking the down arrow in the top right corner of Facebook and selecting Settings & Privacy > Settings > Apps and Websites.
By taking these steps, you can help ensure that your Facebook information is protected and that you don’t lose any important data when deactivating or deleting your account.
Additional Information

If you’re considering deactivating your Facebook account, there are a few things you should keep in mind.
In this section, we’ll cover some additional information that may be helpful to you.
Facebook Messenger
Deactivating your Facebook account does not automatically deactivate your Facebook Messenger account.
If you want to deactivate your Messenger account as well, you need to do it separately.
Here’s how:
- Open the Messenger app on your device.
- Tap on your profile picture in the top left corner.
- Scroll down and tap on “Legal and Policies.”
- Tap on “Deactivate Messenger.”
- Follow the instructions to confirm the deactivation.
Keep in mind that deactivating your Messenger account will also delete all of your messages.
If you want to keep your messages, you should download a copy of them before deactivating your account.
Oculus Products
If you have an Oculus VR headset, deactivating your Facebook account may affect your ability to use it.
Here’s what you need to know:
- If you deactivate your Facebook account, you will also lose access to any Oculus products that are linked to your account.
- You will need to create a new account and link it to your Oculus products if you want to continue using them.
- If you have any games or apps that you purchased on the Oculus Store, you will still be able to access them on your new account.
Keep in mind that if you create a new account, you will need to repurchase any games or apps that you want to use.
Key Takeaways
Deactivating your Facebook account can be a good idea if you want to take a break from social media or if you’re concerned about your privacy.
Here are some key takeaways to keep in mind:
- Deactivating your account is not the same as deleting it. When you deactivate your account, your profile and all your information will be hidden from other users, but it will still be saved on Facebook’s servers. You can reactivate your account at any time by logging back in.
- Before you deactivate your account, make sure you download a copy of your Facebook data. This will include your photos, posts, and messages, so you can keep them for your records. To download your data, go to Settings > Your Facebook Information > Download Your Information.
- When you deactivate your account, you will no longer be able to use Facebook Messenger. If you still want to use Messenger, you can deactivate your Facebook account and keep using Messenger by following these steps: Settings > Account Ownership and Control > Deactivation and Deletion > Deactivate Account > Continue to Messenger.
- If you’re concerned about your privacy, you can take steps to protect your data even if you don’t deactivate your account. For example, you can adjust your privacy settings to limit who can see your posts and information, use two-factor authentication to secure your account, and avoid clicking on suspicious links or downloading unknown apps.
- Keep in mind that deactivating your account may not be a permanent solution. If you’re really serious about protecting your privacy, you may want to consider deleting your account instead. Deleting your account will permanently remove all your information from Facebook’s servers, but it’s important to note that this process can take up to 90 days to complete.