


Adding Avalanche to your MetaMask wallet is a straightforward process that enables you to interact with the Avalanche blockchain and DApps, but how to add Avalanche to Metamask?
Avalanche is an ecosystem of multiple networks that run smart contracts, similar to Ethereum.
The three networks include the Exchange Chain (X-Chain), the Platform Chain (P-Chain), and the Contract Chain (C-Chain).
To add Avalanche to MetaMask, you need to follow a few simple steps.
First, you need to log in to your MetaMask wallet.
Once you’ve logged in, you need to add a new network by entering Avalanche’s network name, new RPC URL, chain ID, symbol, and explorer.
You can retrieve this information on Avalanche’s support website.
Alternatively, you can add Avalanche network to your MetaMask wallet via the Avalanche network explorer.
In this article, we will provide you with a step-by-step guide on how to add Avalanche to your MetaMask wallet.
Whether you’re a seasoned investor or a new user, this guide will help you navigate the process with ease.
So, let’s get started and add Avalanche to your MetaMask wallet!
Post Contents
Downloading and Installing Metamask
Adding Avalanche to Metamask requires you to have the Metamask browser extension installed on your preferred web browser.
Here are the steps to download and install Metamask:
- Open your preferred web browser (Chrome, Opera, Firefox, Brave, or Edge) and navigate to the Metamask website at https://metamask.io/.
- Click the “Download” button located in the top right corner of the screen.
- Select your browser type from the options provided and click the “Install” button.
- Follow the installation prompts to complete the installation process.
Once you have successfully installed Metamask, you will see the Metamask icon in your browser extension toolbar.
Click on the icon to open the Metamask app.
Note that Metamask is also available for iOS and Android devices.
You can download the Metamask app from the App Store or Google Play Store, respectively.
With Metamask installed, you can now proceed to add Avalanche to your wallet.
Creating a Wallet on Metamask
If you don’t already have a Metamask wallet, you can create one in a few simple steps.
To get started, follow these instructions:
- Download the Metamask extension for your preferred web browser (e.g., Google Chrome, Firefox, Brave).
- Click on the Metamask icon in your browser’s toolbar and select “Create a Wallet.”
- Choose a strong password and confirm it. Make sure to choose a password that you will remember, but that is also secure.
- Write down your seed phrase and store it in a safe place. Your seed phrase is the key to your wallet, so make sure to keep it secure. You will need this seed phrase to recover your wallet if you ever lose access to it.
- Confirm your seed phrase by entering it in the correct order.
- Congratulations, you have created your Metamask wallet! You can now use it to store and manage your cryptocurrencies.
Your wallet address will be displayed on the main page of your Metamask wallet.
This is the address that you will use to receive cryptocurrencies.
Make sure to keep your wallet address private and only share it with trusted parties.
How to Add Avalanche to MetaMask
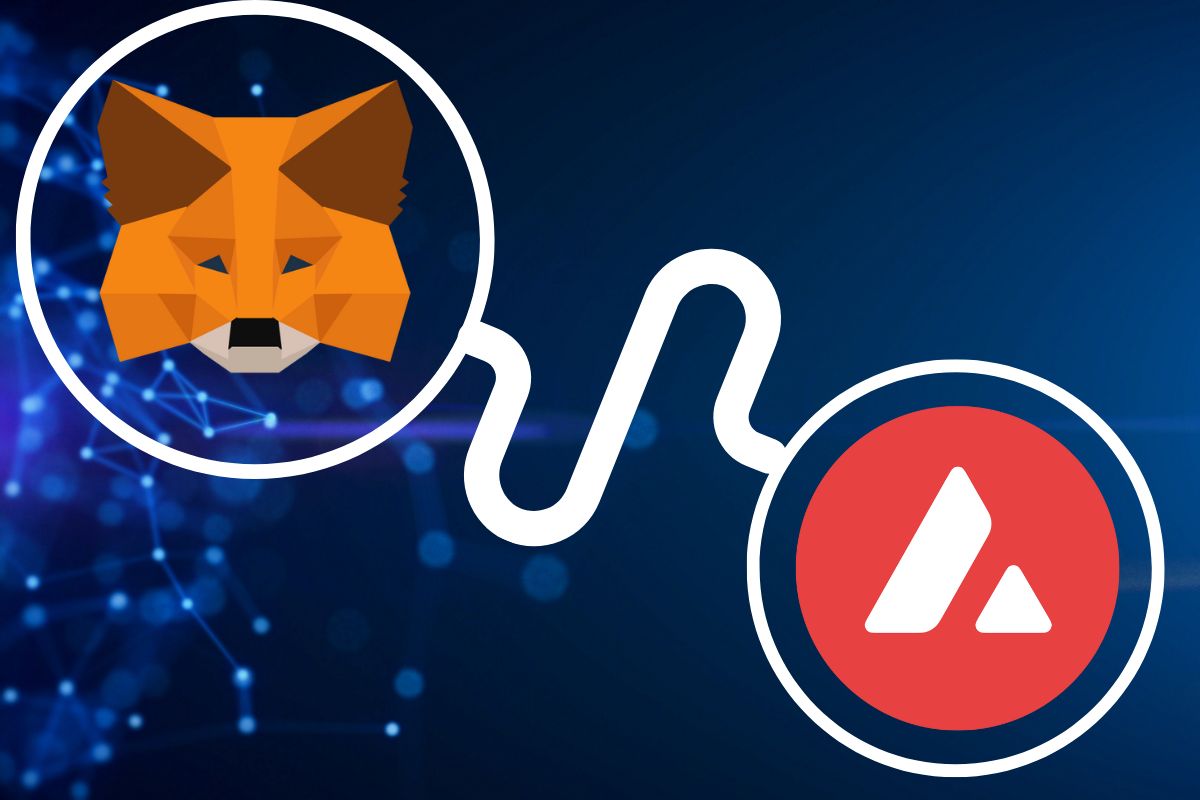
Adding Avalanche to MetaMask is a straightforward process that can be completed in a few simple steps.
Here’s how to do it:
- Open your MetaMask wallet extension on your browser. If you don’t have MetaMask installed yet, you can download it from the official MetaMask website.
- Click on the network selector at the top of the window, where it says “Ethereum Mainnet” by default. From the dropdown menu, select “Custom RPC.”
- In the “New Network” section, enter the following details:
- Network Name: Avalanche
- RPC URL: https://api.avax.network/ext/bc/C/rpc
- Chain ID: 43114
- Symbol: AVAX
- Block Explorer URL: https://cchain.explorer.avax.network/
- Click “Save” to add the Avalanche network to your MetaMask wallet.
Once you’ve added the Avalanche network to your MetaMask, you can start using it to interact with dApps and other services on the Avalanche blockchain.
You can switch between different networks by clicking on the network selector and choosing the network you want to use.
It’s worth noting that Avalanche has two main chains: the C-Chain (for smart contracts) and the X-Chain (for asset transfers).
By default, MetaMask will connect to the C-Chain when you add the Avalanche network, but you can also add the X-Chain by following the same process and using the following RPC URL: https://api.avax.network/ext/bc/X/rpc.
Transferring AVAX to Metamask Wallet

To transfer AVAX tokens to your MetaMask wallet, you first need to ensure that you have added the Avalanche network to your wallet.
Once you have done that, you can follow these simple steps to transfer your AVAX tokens:
- Log in to your exchange wallet that holds your AVAX tokens, such as Binance or any other exchange that supports the Avalanche network.
- Initiate a withdrawal of your AVAX tokens from the exchange wallet to your MetaMask wallet address. Make sure to double-check the address before submitting the withdrawal request.
- Wait for the transaction to be confirmed on the Avalanche network. The time it takes for the transaction to be confirmed may vary depending on network congestion and transaction fees.
- Once the transaction is confirmed, you should see your AVAX tokens in your MetaMask wallet. If you do not see them immediately, try refreshing the wallet or adding the token manually using its contract address.
It’s important to note that when transferring AVAX tokens from an exchange wallet to your MetaMask wallet, you may be charged a transaction fee by the exchange.
Additionally, the transaction fee for transferring AVAX tokens on the Avalanche network may vary depending on network congestion and other factors.
Interacting with Avalanche DApps
Now that you have added the Avalanche network to your MetaMask wallet, you can interact with Avalanche DApps.
Avalanche is a decentralized platform that offers a wide range of applications, including decentralized finance (DeFi) protocols, gaming platforms, and more.
To interact with Avalanche DApps, you need to ensure that MetaMask can support Avalanche.
Since Avalanche is a separate network from Ethereum, you need to add the Avalanche network to your MetaMask wallet.
Once you have done that, you can connect to Avalanche DApps and start using them.
To get started, open your MetaMask wallet and select the Avalanche network from the network dropdown.
You can then navigate to the DApp you want to use and start interacting with it.
Some popular Avalanche DApps include:
- Pangolin: a decentralized exchange (DEX) that allows you to trade cryptocurrencies on the Avalanche network.
- Benqi: a DeFi platform that offers lending, borrowing, and yield farming services on Avalanche.
- Trader Joe: a DEX that offers trading services for various cryptocurrencies on Avalanche.
When using Avalanche DApps, you need to ensure that you have enough AVAX tokens in your wallet to pay for transaction fees.
AVAX is the native cryptocurrency of the Avalanche network and is used to pay for transaction fees and other network services.
In addition to AVAX, some Avalanche DApps may also require you to hold other cryptocurrencies or tokens to use their services.
Make sure to check the requirements of the DApp before using it.
Understanding Fees and Security
When it comes to adding Avalanche to MetaMask, it’s important to understand the fees and security implications involved.
Here are a few things you should keep in mind:
Fees
Adding Avalanche to MetaMask typically incurs a small fee.
This fee is paid in Ethereum (ETH) and is used to cover the cost of processing the transaction on the Ethereum network.
The fee amount varies depending on the current network congestion and can range from a few cents to a few dollars.
Lower Fees
One of the advantages of using Avalanche is that it offers lower fees compared to other blockchain networks.
This means that when you use Avalanche to transact, you can expect to pay significantly lower fees than you would on other networks.
Security
Security is always a concern when it comes to cryptocurrency.
To ensure that your assets are secure, it’s important to only add Avalanche to MetaMask from a trusted source.
Be wary of scams that may try to trick you into adding Avalanche from an untrusted source.
Before adding Avalanche to MetaMask, you should also make sure that you have approved the transaction.
This ensures that you are in control of the transaction and that it can’t be tampered with by a third party.
Exploring Other Features
Now that you have successfully added Avalanche to your MetaMask wallet, you can explore the other features it offers.
Store and Interface
MetaMask allows you to store and manage multiple cryptocurrencies, including Avalanche tokens.
You can easily switch between different networks and subnets, such as the P-Chain and C-Chain, and manage your assets in one place.
The interface is user-friendly and easy to navigate, allowing you to view your transaction history, balances, and other important information.
Log In and Settings
MetaMask also offers a secure log-in process that ensures your private keys are protected.
You can access your wallet from any device by using your seed phrase or password.
The settings menu allows you to customize your experience by adjusting your gas fees, language preferences, and other settings.
Blockchain Explorer
If you want to explore the Avalanche blockchain further, you can use a blockchain explorer like Snowtrace.
This will allow you to view transactions, addresses, and other important information on the blockchain.
Interoperability
Avalanche is a platform chain that supports interoperability with other blockchain networks, such as the Ethereum network and Binance Smart Chain.
This means that you can easily transfer assets between different networks and take advantage of the DeFi ecosystems they offer.
Contract Chain
Avalanche also offers a Contract Chain that allows developers to build decentralized applications (DApps) and smart contracts.
This provides a powerful platform for creating decentralized finance (DeFi) applications and other innovative projects.
Key Takeaways
Adding Avalanche to your MetaMask wallet is a simple process that can be completed in just a few steps.
Here are the key takeaways from this guide:
- You can add Avalanche to your MetaMask wallet by using the Avalanche network explorer or by manually adding the network details.
- Using the network explorer is the easiest way to add Avalanche to your MetaMask wallet.
- When manually adding the network details, make sure to enter the correct RPC URL, chain ID, symbol, and explorer.
- Once you have added Avalanche to your MetaMask wallet, you can start using DApps on the Avalanche network and sending and receiving AVAX tokens.
- Always make sure to keep your MetaMask wallet secure by using a strong password and enabling two-factor authentication.
By following these key takeaways, you should now be able to easily add Avalanche to your MetaMask wallet and start using DApps on the Avalanche network.
Remember to always be cautious when interacting with cryptocurrencies and to keep your wallet secure at all times.