
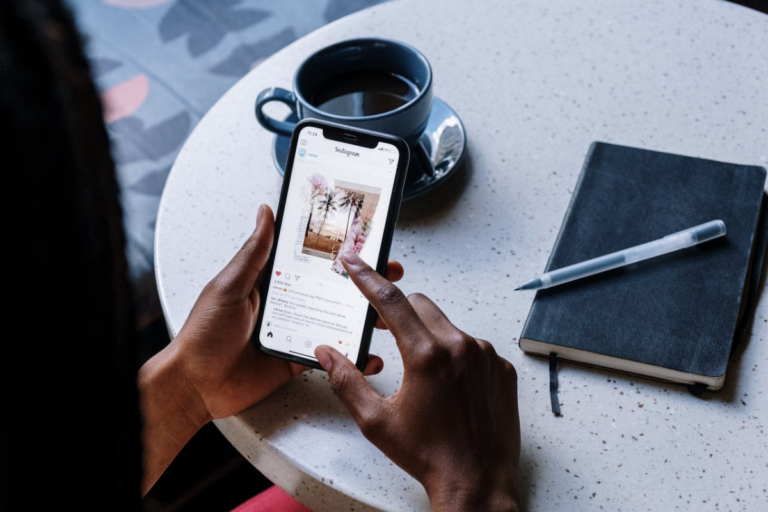


How to change birthday on Facebook?
Changing your birthday on Facebook is a simple process that can be done in a few easy steps.
Whether you’ve entered the wrong birth date or simply want to keep your age private, Facebook allows you to adjust your birthday settings.
In this article, we’ll walk you through the steps to change your birthday on Facebook.
To start, log in to your Facebook account and navigate to your profile page.
From there, click on the “About” tab and select “Contact and Basic Info.”
Scroll down to the “Basic Info” section and click on the pencil icon next to your birth date.
You can now select a new birthday from the available drop-down menus.
It’s important to note that if you change who can see your birthday, you’ll need to choose an audience for both the year as well as the day and month.
This ensures that your birthday is only visible to the people you want to share it with.
By following these simple steps, you can easily change your birthday on Facebook and keep your personal information up to date.
Post Contents
- 1 Understanding Facebook’s Birthday Policies
- 2 Accessing Your Facebook Account
- 3 Navigating to Your Profile Settings
- 4 Editing Your Basic Information
- 5 How to Change Birthday on Facebook
- 6 Saving the Changes
- 7 Understanding Privacy Settings for Your Birthday
- 8 Hiding Your Birthday from Friends
- 9 Confirming Your Birthday Change
- 10 Requesting a Birthday Change
- 11 Contacting Facebook Support
- 12 Understanding Friends’ Birthdays on Facebook
- 13 Key Takeaways
Understanding Facebook’s Birthday Policies
When it comes to changing your birthday on Facebook, it’s important to understand the platform’s policies and limitations.
Here are some key things to keep in mind:
- Facebook allows you to change your birthday once every 365 days. If you’ve already changed it within the last year, you’ll need to wait until the next year to make another change.
- There is also a three-time limit on birthday changes. If you’ve already changed your birthday three times, you won’t be able to change it again.
- When you change your birthday on Facebook, you can choose who can see it. You can set the privacy setting to public, only me, friends, or a custom audience. If you don’t want anyone to see your birthday, you can also choose to block it from being visible to anyone.
- It’s important to note that changing your birthday on Facebook can have consequences. If you’re part of the Facebook community, you’re expected to provide accurate information about yourself. Providing false information could result in your account being suspended or terminated.
- When it comes to your own birthday, you have control over who can see it. Make sure to review your privacy settings and adjust them accordingly.
Facebook’s birthday policies are designed to protect the integrity of the platform and ensure that users are providing accurate information about themselves.
By understanding these policies, you can make informed decisions about how and when to change your birthday on Facebook.
Accessing Your Facebook Account
To change your birthday on Facebook, you first need to access your Facebook account.
You can do this in several ways depending on your device.
Facebook Website
If you prefer to use Facebook on your computer, you can access your account by visiting the Facebook website.
Simply open your web browser and type in “facebook.com” in the address bar.
Once the page loads, enter your login information and click “Log In.”
Facebook App
If you’re using a mobile device, you can access your Facebook account through the Facebook app.
Download the app from the App Store (for iPhone and iPad users) or the Google Play Store (for Android users).
Once you’ve installed the app, open it and enter your login details.
Logging In
Whether you’re using the website or the app, you will be prompted to enter your login information.
This includes your email address or phone number and your password.
If you’ve forgotten your password, you can click on “Forgot Password” to reset it.
Once you’ve entered your login information, click on “Log In” to access your Facebook account.
If you’re using the app, you may be asked to allow the app to access certain features on your device, such as your camera or microphone.
In conclusion, accessing your Facebook account is easy and straightforward.
Whether you prefer to use the website or the app, you can log in quickly and easily using your email address or phone number and password.
To change your birthday on Facebook, you’ll need to navigate to your profile settings.
Here’s how to do it:
- First, log in to your Facebook account using your email address or phone number and password.
- Once you’re logged in, click on your profile icon in the top right corner of the screen. This will take you to your profile page.
- On your profile page, click on the “Edit Profile” button located near your profile picture.
- This will take you to your profile settings page, where you can edit various aspects of your profile, including your birthday.
If you’re having trouble finding the “Edit Profile” button, you can also navigate to your profile settings by clicking on the “More” button located below your profile picture, and then selecting “Edit Profile” from the dropdown menu.
Once you’re on your profile settings page, you can scroll down to the “Basic Info” section and click on the pencil icon next to your birthday to edit it.
Remember that there is a limit to how many times you can change your birthday on Facebook, so make sure you’re happy with your new birthday before you save your changes.
That’s it!
Now that you know how to navigate to your profile settings, you can easily change your birthday on Facebook and keep your profile up-to-date.
Editing Your Basic Information
If you want to change your birthday on Facebook, you’ll need to edit your basic information.
Here’s how you can do it:
- Log in to your Facebook account and click on the “Accounts Center” button located on the top right corner of your screen.
- Click on “Personal details” and then select “Contact info” or “Birthday” to update your information.
- If you want to edit your basic information, go to your profile and click on the “About” section.
- From there, select “Contact and Basic Info” and click on the pencil icon next to the information you want to edit.
- Once you’ve made your changes, click “Save” to update your information.
When editing your basic information, you can choose who can see your information by adjusting your privacy settings.
You can choose to make your information public, visible to friends only, or visible to a custom list of people.
It’s important to keep your basic information up-to-date on Facebook, as it helps your friends and family stay connected with you.
So, make sure to check your basic information regularly and update it as needed.
How to Change Birthday on Facebook
Changing your birthday on Facebook is a simple process that can be done in just a few clicks.
Follow these steps to change your birthday on Facebook:
- Open Facebook and log in to your account.
- Click on the three-line menu in the top right corner of the screen.
- Scroll down and click on “Settings & Privacy”.
- Click on “Settings”.
- Click on “Personal Information”.
- Click on “Birthday”.
- Click on the “Edit” button.
- Change your birthday by selecting a new day, month, and year from the drop-down menus.
- Click on “Save” to confirm the change.
It’s important to note that if you change who can see your birthday, you’ll need to choose an audience for both the year as well as the day and month.
To do this, simply click on the audience selector next to each option and choose who you want to be able to see your birthday.
If you want to remove your birthday from Facebook entirely, you can do so by going to your profile, clicking on “About”, and then clicking on “Contact and Basic Info”.
From there, you can edit who can see your birthday or remove it altogether.
It’s worth noting that Facebook has some limitations on how often you can change your birthday.
If you’ve recently changed your birthday, you may need to wait a certain amount of time before you can change it again.
Saving the Changes
Once you have made the necessary changes to your birthday on Facebook, it’s important to save them properly.
Here are the steps to follow:
- Make sure you have filled out all the required fields in the form correctly. Double-check the day, month, and year to avoid any mistakes.
- Click on the “Save” button after you have made all the changes. This button is usually located at the bottom of the form.
- Facebook will then prompt you to confirm the changes you have made. Review the changes carefully to make sure they are accurate. If everything looks good, click “Save Changes” to confirm.
- After you have saved the changes, Facebook will automatically update your profile with the new information.
It’s important to note that if you change who can see your birthday, you’ll need to choose an audience for both the year as well as the day and month.
Friends won’t get a notification about your upcoming birthday if you don’t share the day and month with them.
In case you encounter any issues while saving the changes, make sure to check your internet connection and try again.
If the problem persists, you can try clearing your browser cache or using a different browser.
Understanding Privacy Settings for Your Birthday
Your birthday is a personal piece of information that you may not want to share with everyone on Facebook.
Fortunately, Facebook provides several privacy settings that allow you to control who can see your birthday.
When you change your birthday on Facebook, you can choose an audience for both the year as well as the day and month.
Here are the different privacy settings available for your birthday:
- Public: Anyone on Facebook can see your birthday.
- Friends: Only your friends on Facebook can see your birthday.
- Only Me: You are the only one who can see your birthday.
To change the privacy settings for your birthday, you can follow the steps below:
- Click on the Settings and privacy option on Facebook.
- Select Settings from the drop-down menu.
- Click on Accounts Center and then select Personal details.
- Click on Birthday and then click Edit.
- Choose the desired privacy setting for your birthday.
- Click Save to confirm the change.
It’s important to note that when you change your birthday privacy settings, it will affect who can see your birthday on your profile, as well as in other places on Facebook where your birthday appears, such as birthday notifications.
It’s also worth mentioning that if you choose to hide your birthday from everyone on Facebook, you may miss out on receiving birthday wishes from your friends.
So, it’s up to you to decide what level of privacy you’re comfortable with for your birthday on Facebook.
Hiding Your Birthday from Friends
If you don’t want your friends to see your birthday on Facebook, you can easily hide it from them.
Here’s how you can do it:
- Open Facebook on your computer or mobile device and log in to your account.
- Click on your profile picture to go to your profile page.
- Click on the “About” tab below your cover photo.
- Scroll down to the “Basic Info” section and click on the pencil icon next to your birthday.
- Select “Only me” from the drop-down menu to make your birthday private.
- Click “Save” to update your privacy settings.
Once you’ve made your birthday private, your friends won’t be able to see it on your profile, and you won’t receive any birthday notifications from Facebook.
However, keep in mind that your birthday may still be visible to some people, such as your Facebook friends who have mutual friends with you or people who are tagged in photos with you.
If you want to hide your birthday from specific friends on Facebook, you can customize your privacy settings for individual friends or groups.
To do this, follow these steps:
- Go to your profile page and click on “Friends” in the left-hand menu.
- Find the friend or group you want to hide your birthday from and click on the three dots next to their name.
- Select “Edit Friend List” or “Edit Privacy” from the drop-down menu.
- Choose “Custom” from the privacy options and click on the pencil icon next to “Don’t share with.”
- Type in the name of the friend or group you want to hide your birthday from and click “Save.”
By customizing your privacy settings, you can control who can see your birthday on Facebook and keep your personal information private.
Confirming Your Birthday Change
After changing your birthday on Facebook, it’s important to confirm the change to ensure that your new birthdate is accurately reflected on your profile.
Here’s how to confirm your birthday change:
- Go to your Facebook profile and click on the “About” section.
- Scroll down to the “Basic Info” section and click on “Edit” next to your birthdate.
- Confirm that the new birthdate you selected is correct.
- Click on “Save” to confirm the change.
Once you’ve confirmed the change, Facebook will update your birthdate on your profile and notify your friends about your upcoming birthday, if you’ve chosen to share it with them.
It’s important to note that changing your birthday on Facebook can also affect your identity verification on the platform.
If you’ve used your birthdate to verify your identity on Facebook, you may need to update this information as well to avoid any issues.
Additionally, changing your birthday can also affect how your birthday is displayed on Facebook.
You can choose who can see your birthdate by adjusting the audience settings, and you can also choose whether or not to receive notifications about upcoming birthdays.
Requesting a Birthday Change
If you need to change your birthday on Facebook, you can request the change through the Help Center.
To do this, follow these steps:
- Go to the Help Center by clicking on the question mark icon in the top right corner of Facebook.
- Type “request a birthday change” in the search bar and select the appropriate option from the results.
- Click on the “Contact Us” button and fill out the form with your information, including your current birthday and the reason why you need to change it.
- Click “Send” to submit your request.
It’s important to provide a valid reason for requesting a birthday change, as Facebook may ask for additional verification if they suspect any fraudulent activity.
Some valid reasons for changing your birthday could include:
- Entering your birthday incorrectly when you first signed up for Facebook
- Protecting your privacy by not sharing your real birthdate
- Needing to change your birthdate due to a legal name change
Once you submit your request, Facebook will review it and may ask for additional documentation to verify your identity.
This could include a government-issued ID or a birth certificate.
It’s important to note that Facebook does not allow you to change your birthday more than once every 60 days, so make sure you double-check your information before submitting your request.
Additionally, if you have already changed your birthday recently, you may need to wait until the 60-day period has passed before you can request another change.
Contacting Facebook Support
If you encounter any issues while changing your birthday on Facebook, you may need to contact Facebook support for assistance.
The Facebook customer support team is available to help you with any issues you may encounter while using the platform.
To contact Facebook support, you can visit the Facebook Help Center.
Here, you can find answers to frequently asked questions, as well as articles on how to use Facebook’s features.
If you can’t find the answer to your question, you can also submit a request to the Facebook community for help.
If you need to contact Facebook support directly, you can try calling their customer support team at +1 650-543-4800 or +1 650-308-7300.
However, Facebook does not often encourage people to contact them via email, so it may be difficult to get a response that way.
When contacting Facebook support, it’s important to be clear and concise about the issue you’re experiencing.
Provide as much detail as possible, including screenshots if necessary, to help the support team understand the problem and provide an effective solution.
Understanding Friends’ Birthdays on Facebook
Facebook is a great platform to keep track of your friends’ birthdays.
When you log in to your account, you will see a notification for upcoming birthdays on the right-hand side of your News Feed.
Here are a few things you need to know about birthdays on Facebook:
- Friends’ Birthdays: When you add someone as a friend on Facebook, you will be able to see their birthday on their profile. You can also view a list of upcoming birthdays by clicking on the “Events” tab on the left-hand side of your News Feed.
- Birthday Notifications: Facebook will send you a notification when one of your friends has a birthday coming up. You can choose to receive these notifications by going to your account settings and selecting “Notifications.” From there, you can customize which notifications you receive and how often you receive them.
- Wishing Happy Birthday: When it’s your friend’s birthday, you can wish them a happy birthday by posting on their timeline or sending them a private message. Facebook also has a feature called “Birthday Stories,” which allows you to create a personalized video or photo collage to wish your friend a happy birthday.
- Changing Your Own Birthday: If you need to change your own birthday on Facebook, you can do so by going to your profile and clicking “Edit Profile.” From there, you can edit your basic information, including your birthday. Keep in mind that if you change your birthday, you may need to confirm your identity with Facebook.
- Privacy Settings: You can control who sees your birthday on Facebook by adjusting your privacy settings. You can choose to share your birthday with everyone, only your friends, or a custom group of people. You can also choose to hide your birthday from your profile altogether.
Key Takeaways
Changing your birthday on Facebook is a simple process that can be useful for keeping your personal information up to date and relevant.
Here are some key takeaways to keep in mind when changing your birthday:
- You can change your birthday on Facebook by going to your profile, clicking on the “About” tab, and selecting “Contact and Basic Info.” From there, you can edit your birthday and choose who can see it.
- Facebook has a limit on how many times you can change your birthday, so make sure you’re happy with your new date before you save your changes.
- Depending on your reasons for changing your birthday, you may also want to consider hiding it from public view. This can be done by selecting “Only me” under the “Who can see your birthday?” option.
- Keep in mind that changing your birthday on Facebook can affect the way your friends and family members interact with you on the platform. For example, Facebook may show your friends a notification when it’s your birthday, so if you change your date, they may not know when to wish you a happy birthday.
- It’s also worth noting that changing your birthday on Facebook may affect your age on the platform, which can impact the types of ads and content you see. If you’re concerned about this, you may want to consider leaving your birthday as is or updating it to a date that’s close to your actual birthday.
Overall, changing your birthday on Facebook is a simple process that can be useful for keeping your personal information up to date.
Just make sure you’re aware of the potential consequences and choose your new date wisely.