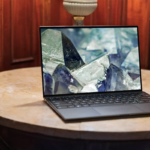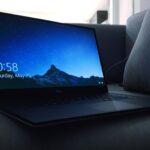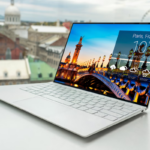


If you’re looking to sell or donate your Dell laptop, it’s important to wipe it clean to protect your personal information.
Luckily, there are a few different ways on how to wipe a Dell laptop.
One option is to reset your laptop to its factory settings, which will erase all of your personal files and return the computer to its original state.
To do this, you can search for “Reset this PC” or go to Settings > Recovery > Reset this PC.
Another option is to use the Windows Recovery Environment to reset your laptop from boot.
If you have a Dell laptop that is compatible with Dell SupportAssist OS Recovery, you can also erase and reset your PC using Dell reset.
This is a useful option if you’ve already migrated your files and settings to your new Dell PC and want to erase your old one.
Post Contents
Understanding the Need to Wipe a Dell Laptop

If you’re planning to sell or donate your Dell laptop, it’s important to wipe all the data from it.
This is to ensure that your personal information, passwords, and other sensitive data don’t fall into the wrong hands.
Even if you’re not planning to sell or donate your laptop, wiping it clean can be useful if you want to start fresh or if your laptop is infected with malware.
When you delete files from your laptop, they’re not actually gone.
They’re still stored on your hard drive, and anyone with the right tools can recover them.
That’s why you need to wipe your laptop clean to make sure that all your data is permanently erased.
Wiping your Dell laptop involves deleting all the data from your hard drive and restoring it to its original factory settings.
This means that all your personal files, settings, and programs will be erased, and your laptop will be restored to the way it was when you first bought it.
To ensure that your data is completely wiped, you can use a data wiping tool.
Dell laptops come with a built-in tool called Data Wipe, which allows you to securely erase all the data from your hard drive.
This tool is accessible from within the BIOS setup, and it’s a quick and easy way to wipe your laptop clean.
Remember, wiping your Dell laptop is an important step in protecting your personal information and ensuring that your laptop is secure.
So, before you sell or donate your laptop, make sure to wipe it clean using the appropriate tools and methods.
Preparation Before Wiping
Before wiping your Dell laptop, it is important to take a few steps to ensure that your personal data is backed up and that you are prepared for the process.
Here are some things to keep in mind:
- Backup your personal data: Before wiping your laptop, make sure that you have backed up all of your personal data, including documents, photos, and any other important files. You can do this by copying your files to an external hard drive, uploading them to a cloud storage service, or using a backup program. This will ensure that you don’t lose any important data during the wiping process.
- Use Dell Datasafe Restore: Dell laptops come with a built-in backup and recovery program called Dell Datasafe Restore. This program can help you create a backup of your entire system, including your operating system, drivers, and personal data. You can use this program to create a backup before wiping your laptop, so that you can easily restore your system if something goes wrong.
- Prepare any installation media: If you plan on reinstalling Windows after wiping your laptop, make sure that you have any necessary installation media, such as a Windows installation disc or USB drive. You may also need to download any necessary drivers or software from Dell’s website.
- Consider data recovery options: If you have already wiped your laptop and realized that you forgot to back up some important data, don’t panic. There are data recovery services available that may be able to recover your lost data. However, keep in mind that these services can be expensive and there is no guarantee that they will be able to recover all of your data.
By taking these steps before wiping your Dell laptop, you can ensure that you are prepared for the process and that your personal data is backed up and secure.
Exploring Different Wiping Methods
When it comes to wiping your Dell laptop, there are several methods available.
Each method has its own benefits, depending on your specific needs.
Here are some of the most common wiping methods:
Factory Reset
A factory reset is the most straightforward way to wipe your Dell laptop.
This method will erase all data and return your laptop to its original state when you first purchased it.
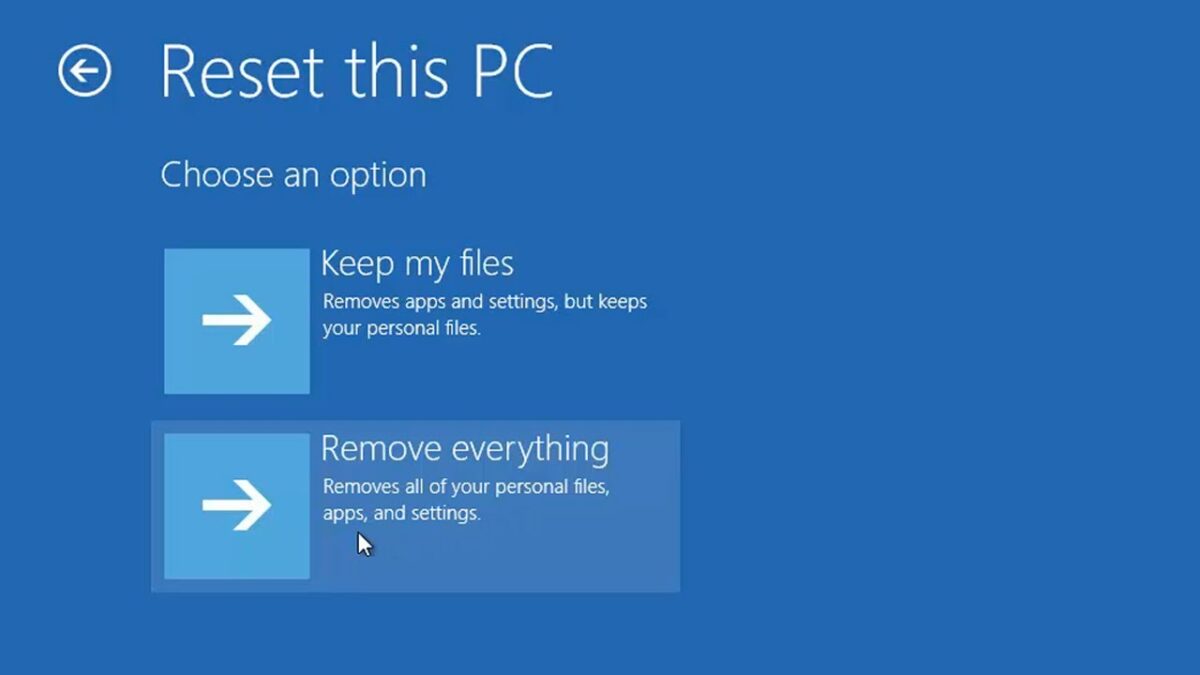
To perform a factory reset, go to Settings > Update & Security > Recovery > Reset this PC > Get started.
From there, you can choose to either keep your personal files or remove everything.
Cloud Download
If you have a stable internet connection, you can use the cloud download option to wipe your Dell laptop.
This method allows you to download a fresh copy of Windows 10 directly from Microsoft’s servers.
To use this method, go to Settings > Update & Security > Recovery > Reset this PC > Cloud download.
Remove Everything
The “Remove Everything” option is another way to wipe your Dell laptop.
This method will erase all data and installed apps from your laptop.
To perform this method, go to Settings > Update & Security > Recovery > Reset this PC > Remove everything.
Local Reinstall
A local reinstall is a quick way to wipe your Dell laptop.
This method will erase all data and installed apps, but it will keep your personal files intact.
To perform a local reinstall, go to Settings > Update & Security > Recovery > Advanced startup > Troubleshoot > Reset this PC > Keep my files.
Secure Erase
Secure Erase is a method of wiping your Dell laptop that ensures that your data is completely erased and cannot be recovered.
This method is useful if you have sensitive data on your laptop that you need to protect.
To perform a secure erase, you will need to use a third-party software tool that supports this feature.
DOD 5220.22-M
The DOD 5220.22-M method is a standard used by the US Department of Defense to wipe data from hard drives.
This method overwrites the data on your laptop multiple times, making it nearly impossible to recover.
To perform a DOD 5220.22-M wipe, you will need to use a third-party software tool that supports this feature.
Erase Data
If you want to wipe specific files or folders from your Dell laptop, you can use the “Erase Data” option.
This method will permanently delete the selected files or folders from your laptop.
To use this method, right-click on the file or folder you want to delete and select “Delete” from the context menu.
Overwrite
Overwriting is a method of wiping your Dell laptop that involves writing over the data on your hard drive with random data.
This method makes it difficult for anyone to recover your data.
To perform an overwrite, you will need to use a third-party software tool that supports this feature.
How to Wipe a Dell Laptop
If you’re planning to sell or give away your Dell laptop, it’s important to wipe all your personal data from the device to protect your privacy.
Here’s how you can wipe your Dell laptop using the built-in features in Windows and Dell.
Wiping with Windows Built-in Feature
Windows has a built-in feature called “Reset This PC” that allows you to wipe your Dell laptop and reinstall Windows.
Here’s how to use it:
- Click on the Start menu and select “Settings.”
- Click on “Update & Security” and then select “Recovery.”
- Under “Reset this PC,” click on the “Get started” button.
- Choose the option “Remove everything” to wipe your laptop completely.
- Follow the on-screen instructions to complete the process.
Note that this process may take some time, depending on the size of your hard drive and the speed of your laptop.
Wiping with Dell’s Built-in Feature
Dell laptops come with a built-in feature called “SupportAssist OS Recovery” that allows you to wipe your laptop and reinstall Windows.
Here’s how to use it:
- Turn on your Dell laptop and press the F12 key repeatedly to enter the boot menu.
- Select “SupportAssist OS Recovery” from the boot menu and press Enter.
- Click on “Troubleshoot” and then select “Reset this PC.”
- Choose the option “Remove everything” to wipe your laptop completely.
- Follow the on-screen instructions to complete the process.
Note that this process may take some time, depending on the size of your hard drive and the speed of your laptop.
In both cases, make sure you have backed up all your important files and data before wiping your laptop.
Once you wipe your laptop, all your personal data will be lost and cannot be recovered.
Post-Wiping Actions
Congratulations! You have successfully wiped your Dell laptop and erased all your personal data.
However, there are a few post-wiping actions you should take to ensure that your laptop is ready for the next user.
System Restore and Recommended Restore
After wiping your laptop, you may want to consider performing a system restore to revert your laptop to its original state.
This can be useful if you encounter any issues with your laptop’s performance or functionality.
You can also perform a recommended restore to install any necessary drivers and updates.
System Protection
Enabling System Protection can help protect your laptop from future threats and malware.
System Protection creates restore points that allow you to revert your laptop to a previous state if any issues arise.
Partitions
If you want to create new partitions on your laptop’s hard drive, you can use a partition manager like AOMEI Partition Assistant Standard.
This tool allows you to resize, move, and create partitions without losing any data.
Other Considerations
Before handing over your laptop to the next user, you should also consider the following:
- Install any necessary drivers and updates.
- Uninstall any unnecessary software or programs.
- Clean the laptop’s exterior and keyboard.
- Check the laptop’s battery life and charging capabilities.
By taking these post-wiping actions, you can ensure that your Dell laptop is ready for its next user and will provide a smooth and hassle-free experience.
Troubleshooting Common Issues
If you encounter any issues while wiping your Dell laptop, don’t worry.
There are some common issues that you might face and they can be easily resolved.
Here are some troubleshooting tips to help you:
- Keyboard input method: Make sure that the keyboard input method is set to the correct language. If the keyboard input method is incorrect, you may not be able to enter the correct characters to complete the wiping process.
- Advanced Boot Options: If your Dell laptop is not starting up properly, you can try accessing the Advanced Boot Options. This can be done by pressing the F8 key repeatedly during startup. From there, you can try to repair your computer or access other advanced options.
- Repair Your Computer: If you are unable to start up your Dell laptop, you can try to repair your computer using the Windows Recovery Environment. This can be accessed by booting from a Windows installation disc or USB drive. From there, you can try to repair your computer or access other advanced options.
- Dell Knowledge Base Article: If you are still having issues, you can refer to the Dell Knowledge Base Article for more information. This article provides detailed instructions on how to troubleshoot and resolve common issues that you might encounter while wiping your Dell laptop.
By following these troubleshooting tips, you should be able to resolve most common issues that you might encounter while wiping your Dell laptop.
If you still have issues, you can contact Dell technical support for further assistance.
Understanding Data Recovery Post-Wiping
When you wipe your Dell laptop, you may think that all your data is gone forever.
However, it is important to understand that data recovery is still possible even after wiping your laptop.
In this section, we will discuss data recovery, data recovery software, and how to ensure clean data after wiping your Dell laptop.
Data Recovery
Data recovery is the process of retrieving lost or deleted data from a storage device.
This can be done using various techniques and software.
Even after wiping your Dell laptop, it is still possible for someone to recover your data if they have the right tools and knowledge.
Data Recovery Software
Data recovery software is a tool that can be used to recover lost or deleted data.
There are many different types of data recovery software available, and some are more effective than others.
It is important to note that data recovery software may not be able to recover all data, especially if the data has been overwritten.
Clean Data
To ensure that your data is truly gone after wiping your Dell laptop, you need to ensure that the data has been overwritten.
This means that the data has been replaced with new data, making it impossible to recover the original data.
To ensure clean data, it is recommended to use a data wiping tool that overwrites the data multiple times.
Specific Instructions for Different Dell Models
When it comes to wiping your Dell laptop, the process can differ depending on the model you have.
Here are specific instructions for wiping different Dell models:
Wiping Dell Inspiron
To wipe your Dell Inspiron laptop, follow these steps:
- Back up any important data you want to keep.
- Restart your laptop and press F12 to enter the boot menu.
- Select “Diagnostics” and press Enter.
- Choose “Custom Test” and select the hard drive.
- Select “Thorough Test Mode” and let the test run.
- Restart your laptop and press F12 again to enter the boot menu.
- Select “Boot to USB Drive” and follow the prompts to wipe your hard drive.
Wiping Dell Alienware
To wipe your Dell Alienware laptop, follow these steps:
- Back up any important data you want to keep.
- Restart your laptop and press F12 to enter the boot menu.
- Select “Diagnostics” and press Enter.
- Choose “Custom Test” and select the hard drive.
- Select “Thorough Test Mode” and let the test run.
- Restart your laptop and press F12 again to enter the boot menu.
- Select “Boot to USB Drive” and follow the prompts to wipe your hard drive.
Wiping Dell Optiplex
To wipe your Dell Optiplex desktop computer, follow these steps:
- Back up any important data you want to keep.
- Restart your computer and press F12 to enter the boot menu.
- Select “Diagnostics” and press Enter.
- Choose “Custom Test” and select the hard drive.
- Select “Thorough Test Mode” and let the test run.
- Restart your computer and press F12 again to enter the boot menu.
- Select “Boot to USB Drive” and follow the prompts to wipe your hard drive.
Wiping Dell Vostro
To wipe your Dell Vostro laptop, follow these steps:
- Back up any important data you want to keep.
- Restart your laptop and press F12 to enter the boot menu.
- Select “Diagnostics” and press Enter.
- Choose “Custom Test” and select the hard drive.
- Select “Thorough Test Mode” and let the test run.
- Restart your laptop and press F12 again to enter the boot menu.
- Select “Boot to USB Drive” and follow the prompts to wipe your hard drive.
Wiping Dell XPS
To wipe your Dell XPS laptop, follow these steps:
- Back up any important data you want to keep.
- Restart your laptop and press F12 to enter the boot menu.
- Select “Diagnostics” and press Enter.
- Choose “Custom Test” and select the hard drive.
- Select “Thorough Test Mode” and let the test run.
- Restart your laptop and press F12 again to enter the boot menu.
- Select “Boot to USB Drive” and follow the prompts to wipe your hard drive.
Wiping Dell G Series
To wipe your Dell G Series laptop, follow these steps:
- Back up any important data you want to keep.
- Restart your laptop and press F12 to enter the boot menu.
- Select “Diagnostics” and press Enter.
- Choose “Custom Test” and select the hard drive.
- Select “Thorough Test Mode” and let the test run.
- Restart your laptop and press F12 again to enter the boot menu.
- Select “Boot to USB Drive” and follow the prompts to wipe your hard drive.
Wiping Dell Fixed Workstations
To wipe your Dell Fixed Workstation, follow these steps:
- Back up any important data you want to keep.
- Restart your computer and press F12 to enter the boot menu.
- Select “Diagnostics” and press Enter.
- Choose “Custom Test” and select the hard drive.
- Select “Thorough Test Mode” and let the test run.
- Restart your computer and press F12 again to enter the boot menu.
- Select “Boot to USB Drive” and follow the prompts to wipe your hard drive.
Wiping Dell Mobile Workstations
To wipe your Dell Mobile Workstation, follow these steps:
- Back up any important data you want to keep.
- Restart your laptop and press F12 to enter the boot menu.
- Select “Diagnostics” and press Enter.
- Choose “Custom Test” and select the hard drive.
- Select “Thorough Test Mode” and let the test run.
- Restart your laptop and press F12 again to enter the boot menu.
- Select “Boot to USB Drive” and follow the prompts to
Key Takeaways
When it comes to wiping a Dell laptop, there are a few key takeaways to keep in mind.
Here are some important things to remember:
- Back up your important files: Before wiping your Dell laptop, make sure to back up any important files or documents that you want to keep. This can be done by transferring them to an external hard drive, cloud storage, or another device.
- Choose the right method: There are several ways to wipe a Dell laptop, including resetting it to factory settings, using Windows Recovery Environment, and using Dell SupportAssist OS Recovery. Make sure to choose the method that is most appropriate for your needs.
- Follow the instructions carefully: Whether you are resetting your Dell laptop or using a third-party tool, it is important to follow the instructions carefully to avoid any errors or complications.
- Be patient: Wiping a Dell laptop can take some time, so be patient and allow the process to complete before using your laptop again.
By keeping these key takeaways in mind, you can ensure that your Dell laptop is wiped correctly and that your data is protected.