


how to update BIOS ASUS?
Updating the BIOS on your ASUS motherboard can be a daunting task, but it is essential to ensure that your computer is running smoothly and efficiently.
BIOS updates can fix bugs, improve system stability, and add new features to your motherboard.
In this article, we will guide you through the process of updating the BIOS on your ASUS motherboard.
There are several methods you can use to update your ASUS motherboard BIOS.
One method is to use the ASUS EZ Update tool, which is included in the ASUS AI Suite 3 software.
Another method is to use the ASUS EZ Flash utility, which allows you to flash the BIOS from a USB device.
If your motherboard supports USB BIOS FlashBack, you can also use this method to update the BIOS.
We will cover each of these methods in detail, so you can choose the one that works best for you.
Before you start updating your BIOS, it is essential to ensure that you have the correct BIOS file for your motherboard.
You can download the BIOS file from the ASUS website or use the MyASUS app to download it automatically.
It is also crucial to follow the instructions carefully and avoid interrupting the update process.
Failure to follow the instructions correctly can result in a bricked motherboard, which can be costly to repair.
Post Contents
Understanding BIOS and Its Importance
When it comes to your computer’s hardware, the BIOS (Basic Input/Output System) is one of the most important components.
It is responsible for initializing and configuring hardware components during the boot process.
Without the BIOS, your computer would not be able to start up and run properly.
The BIOS is stored on a chip on the motherboard and provides a low-level interface between the hardware and the operating system.
It contains system settings such as the date and time, boot order, and hardware configuration.
You can access the BIOS by pressing a specific key during startup, which varies depending on the motherboard manufacturer.
Updating the BIOS can improve performance, fix bugs, and add support for new CPUs and hardware.
It is important to keep your BIOS up to date to ensure that your computer is running smoothly and efficiently.
However, it is important to note that updating the BIOS can be risky and should only be done if necessary.
When updating the BIOS, it is important to follow the manufacturer’s instructions carefully and ensure that you have the correct BIOS file for your motherboard.
It is also recommended to back up your current BIOS before updating in case anything goes wrong.
Identifying Your Asus Motherboard
Before updating your Asus motherboard’s BIOS, you need to identify the model name of your motherboard.
Here are some ways to do that:
- Check the motherboard’s packaging: The model name is usually printed on the box in which the motherboard came.
- Check the motherboard itself: The model name is usually printed on the motherboard itself. Look for it near the CPU socket or the memory slots.
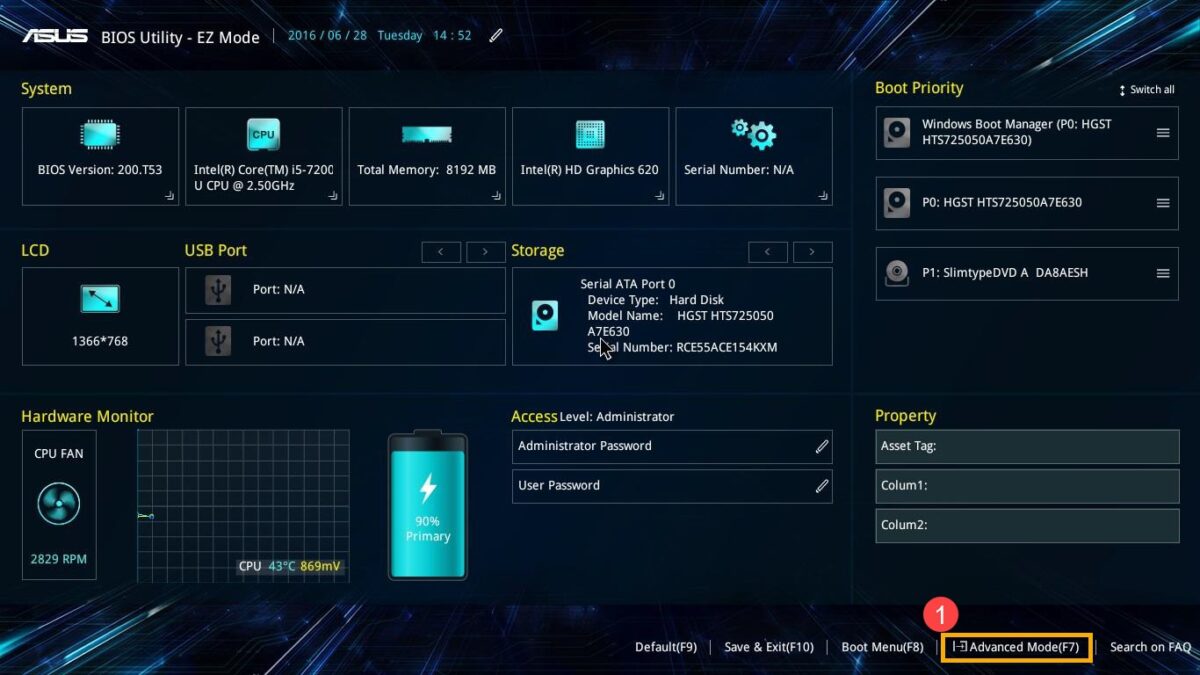
- Check the BIOS: You can also check the BIOS to find the model name. When you boot up your system, press the DEL key to enter the BIOS. The model name should be displayed on the main screen.
If you’re still having trouble identifying your Asus motherboard, you can visit the Asus website and use their online support tools.
They have a tool that can automatically detect your motherboard model and provide you with the necessary information.
It’s important to note that Asus motherboards come in different sizes and form factors, such as ATX, Micro-ATX, and Mini-ITX.
It’s important to know the size of your motherboard before purchasing any new hardware components to ensure compatibility.
Checking Your Current BIOS Version
Before updating your BIOS, it’s important to know what version you currently have installed.
This will help you determine if you need to update, and which version you need to download.
There are a few ways to check your current BIOS version on an ASUS motherboard:
Method 1: Check from UEFI BIOS
- Restart your computer and enter the UEFI BIOS by pressing the “Del” key during boot-up.
- Look for the BIOS version information on the main screen.
Method 2: Check from System Information
- Press the “Windows” key + “R” to open the Run dialog box.
- Type “msinfo32” and press “Enter” to open the System Information window.
- Look for the BIOS version information under the “System Summary” section.
Method 3: Check from Command Prompt
- Press the “Windows” key + “R” to open the Run dialog box.
- Type “cmd” and press “Enter” to open the Command Prompt.
- Type “wmic bios get smbiosbiosversion” and press “Enter” to display the BIOS version.
Once you have determined your current BIOS version, you can compare it to the latest version available on the ASUS website to see if an update is necessary.
Accessing Asus Support Page
If you need to update the BIOS on your ASUS device, the first step is to access the ASUS Support Page.
Here’s how:
- Open your web browser and go to the ASUS Support Site.
- Once you’re on the ASUS Support Site, you can access the ASUS Download Center by clicking on the “Drivers & Tools” tab.
- From there, you can select your product type and model to find the appropriate BIOS update.
- If you’re unsure which product type or model you have, you can use the search bar to find it quickly.
- Once you’ve located the correct BIOS update, simply download it to your device.
If you have any questions or issues during this process, ASUS customer support is available to assist you. You can find their contact information on the ASUS Support Site as well.
Downloading the Latest BIOS File
To update the BIOS on your ASUS computer, you need to download the latest BIOS file.
Here’s how you can do it:
- Go to the ASUS website and navigate to the “Support” section.
- Click on “Driver & Tools” and select your product type, series, and model.
- Once you find your motherboard on the site, go to the “BIOS & Firmware” tab.
- Here, you can download the latest BIOS file. Make sure to select the correct version for your operating system.
- Extract the BIOS update file that you just downloaded.
- You can now update your BIOS using one of the methods provided by ASUS. Make sure to follow the instructions carefully to avoid any issues during the update process.
It’s important to note that updating your BIOS can be risky, so make sure to back up your data and read the instructions carefully before proceeding. If you have any doubts or issues during the process, don’t hesitate to contact ASUS support for assistance.
Preparing Your USB Flash Drive
Before updating your BIOS, you’ll need to prepare a USB flash drive to store the update files.
Here are some steps to get your USB flash drive ready:
- Make sure you have a USB flash drive that is compatible with your computer’s USB ports. USB 2.0 and USB 3.0 ports are commonly used on ASUS motherboards.
- Format the USB flash drive to the FAT32 file system. This is important because the BIOS update utility requires the USB flash drive to be formatted in this file system. If your USB flash drive is not formatted to FAT32, you may encounter errors during the update process.
- Make sure your USB flash drive is empty or has enough space to store the BIOS update files. It’s recommended to use a USB flash drive with at least 1GB of storage capacity.
- Double-check that you have downloaded the correct BIOS update file from the ASUS website. Make sure you have saved the file to your computer’s hard drive before transferring it to the USB flash drive.
- Copy the BIOS update file to the root directory of the USB flash drive. Do not place the file in any folders or subdirectories on the USB flash drive.
By following these steps, you’ll have a USB flash drive that is ready to update your BIOS.
How to Update BIOS Asus
Updating the BIOS on your Asus motherboard can help improve system stability, compatibility with new hardware, and performance.
In this section, we will discuss four different methods for updating your Asus BIOS.
Using Asus EZ Flash for BIOS Update
Asus EZ Flash is a built-in utility that allows you to update the BIOS from within the BIOS itself.
Here’s how to use it:
- Download the latest BIOS file from the Asus website.
- Save the BIOS file to a USB flash drive.
- Restart your computer and enter the BIOS by pressing the designated key during startup.
- Navigate to the EZ Flash utility in the BIOS menu.
- Select the BIOS file from the USB flash drive and follow the on-screen instructions to complete the update.
Using Asus Live Update for BIOS Update
Asus Live Update is a Windows-based utility that allows you to update the BIOS from within Windows.
Here’s how to use it:
- Download and install the Asus Live Update utility from the Asus website.
- Launch the Asus Live Update utility and follow the on-screen instructions to check for and download the latest BIOS update.
- Once the BIOS update has been downloaded, follow the on-screen instructions to install it.
Using Asus AI Suite 3 for BIOS Update
Asus AI Suite 3 is a Windows-based utility that includes a BIOS update tool.
Here’s how to use it:
- Download and install Asus AI Suite 3 from the Asus website.
- Launch Asus AI Suite 3 and navigate to the “Update” tab.
- Select “BIOS” from the drop-down menu and click “Check for Update.”
- If a BIOS update is available, follow the on-screen instructions to download and install it.
Using Asus BIOS Flashback for BIOS Update
Asus BIOS Flashback is a feature that allows you to update the BIOS even if your system is unable to boot. Here’s how to use it:
- Download the latest BIOS file from the Asus website.
- Save the BIOS file to a USB flash drive.
- Insert the USB flash drive into the designated BIOS Flashback USB port on your Asus motherboard.
- Press and hold the BIOS Flashback button on the motherboard for 5-10 seconds.
- Wait for the BIOS Flashback LED to stop blinking, indicating that the update is complete.
Updating your Asus BIOS can help improve system stability, compatibility, and performance. Use one of the methods above to ensure that your system is running the latest BIOS version.
Troubleshooting Post-Update Issues
After updating your BIOS, you may encounter some issues that prevent your computer from booting up properly.
Here are some common problems and their solutions:
Post Issues
If your computer fails to boot up after the BIOS update, you can try the following:
- Check if your computer is still under warranty. If it is, contact ASUS support for assistance.
- Try to boot into safe mode. If you can boot into safe mode, you may be able to fix the issue by uninstalling the problematic driver or software.
- Reset your BIOS to default settings. This may help resolve any configuration issues that may have arisen after the update.
Crashes
If your computer crashes after the BIOS update, you can try the following:
- Check if your computer is still under warranty. If it is, contact ASUS support for assistance.
- Try updating your drivers. Outdated or incompatible drivers can cause crashes.
- Check your hardware. Faulty hardware can also cause crashes.
Legacy Mode vs. UEFI Mode
If you updated your BIOS from Legacy mode to UEFI mode or vice versa, you may encounter some issues.
Here’s what you can do:
- If you updated from Legacy mode to UEFI mode, try changing the boot mode back to Legacy mode.
- If you updated from UEFI mode to Legacy mode, try changing the boot mode back to UEFI mode.
- If changing the boot mode doesn’t work, try resetting your BIOS to default settings.
Resetting Your BIOS
If you need to reset your BIOS, you can do so by following these steps:
- Turn off your computer.
- Press the power button to turn it back on.
- Press the key that opens the BIOS setup utility. This key varies depending on your computer’s manufacturer. For ASUS computers, it’s usually the Delete key.
- In the BIOS setup utility, navigate to the “Exit” menu.
- Select “Load Setup Defaults” and press Enter.
- Confirm that you want to reset the BIOS to default settings.
- Save the changes and exit the BIOS setup utility.
Using Command Prompt
If you’re comfortable using the command prompt, you can try the following:
- Boot your computer into the Windows Recovery Environment.
- Select “Troubleshoot” > “Advanced options” > “Command Prompt”.
- Type the following command:
bcdedit /set {bootmgr} displaybootmenu no - Press Enter.
- Type the following command:
exit - Press Enter to exit the command prompt.
- Restart your computer.
Key Takeaways
Updating the BIOS of your ASUS motherboard is an important task that can improve the stability and performance of your system.
Here are some key takeaways to keep in mind when updating your BIOS:
- Always read the instructions carefully before updating your BIOS. ASUS offers three ways to update the BIOS of your motherboard, including using the BIOS menu (EZ Flash), using the Windows system (EZ Update), or using the AI Suite 3 tool.
- Make sure you have the correct BIOS file for your motherboard model. You can find the latest BIOS files on the ASUS website. It’s important to choose the correct file, as installing the wrong BIOS can cause permanent damage to your system.
- Before updating the BIOS, make sure to backup your important data. While updating the BIOS is generally safe, there’s always a risk of data loss or system instability. It’s a good idea to backup your important files and documents to an external drive or cloud storage service.
- During the BIOS update process, do not turn off your system or disconnect the power supply. Interrupting the update process can cause permanent damage to your motherboard. Make sure to follow the instructions carefully and allow the update process to complete.
- After updating the BIOS, make sure to reset your BIOS settings to the default values. This will ensure that your system is configured correctly and running at optimal performance. You can reset the BIOS settings by entering the BIOS menu and selecting the “Load Setup Defaults” option.
By following these key takeaways, you can safely and effectively update the BIOS of your ASUS motherboard.
Remember to always read the instructions carefully and backup your data before proceeding with the update.