


How to split screen on Dell?
Split screen is a convenient feature that allows you to view and work on two windows simultaneously.
With split screen, you can increase productivity and multitask efficiently.
Split screen is available on all Dell laptops and desktops.
You can manually split the screen by dragging and resizing windows or use built-in Windows features to automatically split the screen.
In this article, we will guide you through the steps on how to split screen on your Dell computer, so you can easily work on multiple windows at once.
Post Contents
- 1 How to Split Screen on Dell
- 2 Split Screen on Different Windows Versions
- 3 Utilizing Dell’s Features for Split Screen
- 4 Split Screen on Multiple Monitors
- 5 Using Keyboard and Mouse for Split Screen
- 6 Adjusting Display Settings
- 7 Additional Tips for Split Screen
- 8 Troubleshooting Split Screen Issues
- 9 Key Takeaways
How to Split Screen on Dell
The split-screen feature is a great way to multitask on your Dell laptop.
It allows you to view and work on multiple applications at the same time without having to switch between them constantly.
In this section, we will show you how to split screen on your Dell laptop.
To start, open the two applications or windows that you want to split screen.
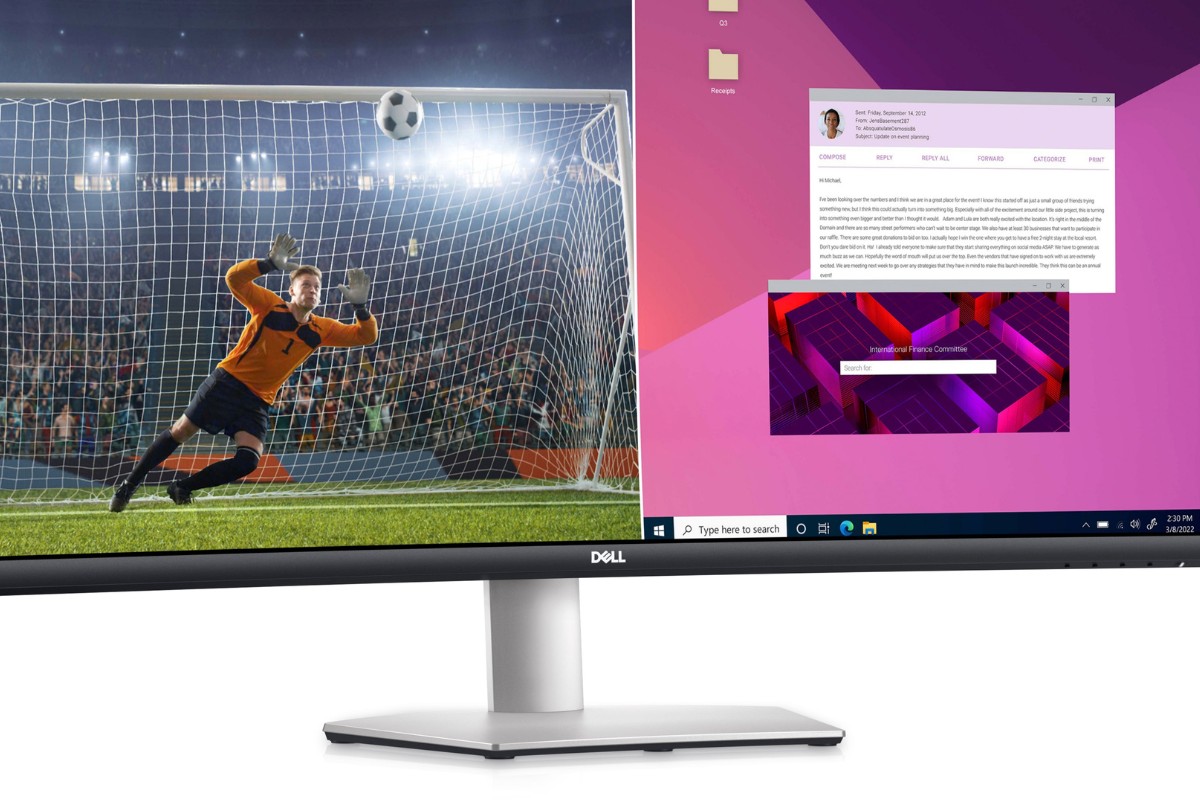
You can use Windows’ built-in snap feature to place two windows side-by-side on your Dell computer. Here’s how:
- Click and drag the title bar of one window. This will allow you to move the window around the screen.
- Drag the window to the left or right side of the screen until it snaps into place.
- Repeat the process with the other window, but make sure you drag it to the opposite side of the screen.
You should now have two windows side-by-side on your Dell laptop screen.
You can adjust the size of each window by clicking and dragging the divider between them.
If you want to split screen more than two windows, simply repeat the process with each additional window.
You can split screen as many windows as you want, as long as your screen is big enough to accommodate them.
In addition to the snap feature, Windows also has a split-screen feature that allows you to split screen up to four windows at once.
To use this feature, press the Windows key + Tab on your keyboard. This will open the Task View screen, where you can select the windows you want to split screen.
In conclusion, splitting screen on your Dell laptop is a great way to multitask and increase productivity.
With the snap feature and split-screen feature, you can easily work on multiple applications at the same time without having to constantly switch between them.
Split Screen on Different Windows Versions
If you are using a Dell laptop with a Windows operating system, you can split your screen to multitask more efficiently.
Here’s how to split your screen on different Windows versions:
Split Screen on Windows 7
Splitting your screen on Windows 7 is relatively easy.
First, open the two applications you want to use side by side.
Then, click and hold the title bar of the first window and drag it to the left or right side of the screen until the cursor reaches the edge.
Next, click and hold the title bar of the second window and drag it to the opposite side of the screen.
Split Screen on Windows 8
Splitting your screen on Windows 8 is similar to Windows 7.
First, open the two applications you want to use side by side.
Then, drag one of the windows to the left or right side of the screen until the cursor reaches the edge.
The screen will split, and you can select the second application to fill the other half.
Split Screen on Windows 10
Windows 10 has a built-in feature called Snap Assist, which makes splitting your screen even easier.
First, open the two applications you want to use side by side.
Then, click and hold the title bar of the first window and drag it to the left or right side of the screen until the cursor reaches the edge.
The screen will split, and you can select the second application to fill the other half.
Alternatively, you can use keyboard shortcuts to split your screen.
Press the Windows key and the left or right arrow key to snap the window to the left or right side of the screen.
Split Screen on Windows 11
Splitting your screen on Windows 11 is similar to Windows 10.
First, open the two applications you want to use side by side.
Then, click and hold the title bar of the first window and drag it to the left or right side of the screen until the cursor reaches the edge.
The screen will split, and you can select the second application to fill the other half.
Alternatively, you can use keyboard shortcuts to split your screen.
Press the Windows key and the left or right arrow key to snap the window to the left or right side of the screen.
Overall, splitting your screen on a Dell laptop with a Windows operating system is a great way to boost productivity.
Whether you’re working on a project or just browsing the web, splitting your screen can help you get more done in less time.
Utilizing Dell’s Features for Split Screen
If you own a Dell laptop, you have access to some features that can make split-screen viewing a lot easier.
Here are two of the most useful features:
Dell Display Manager
Dell Display Manager is a software that comes pre-installed on many Dell laptops.
It allows you to customize your display settings and split your screen into multiple windows.
Here’s how to use it:
- Open Dell Display Manager by clicking on the icon in your system tray.
- Click on the “Split Screen” tab.
- Choose the layout you want by clicking on one of the options.
- Drag and drop the windows you want to use into the different sections of the split screen.
You can also customize the size of each section by dragging the borders between them. Dell Display Manager makes it easy to split your screen into two, three, or even four sections.
Easy Arrange
Another feature that can help you split your screen on a Dell laptop is Easy Arrange.
This feature allows you to quickly arrange your windows into a split-screen view with just a few clicks.
Here’s how to use it:
- Click on the “Easy Arrange” button in the top right corner of your screen.
- Choose the layout you want by clicking on one of the options.
- Drag and drop the windows you want to use into the different sections of the split screen.
Easy Arrange is a great option if you want to quickly split your screen without having to manually drag and resize windows. It’s also a good option if you’re not sure how to use Dell Display Manager.
In conclusion, Dell laptops come with some great features that can help you split your screen and increase your productivity.
Dell Display Manager and Easy Arrange are two of the most useful features, and they’re easy to use. Give them a try and see how they can help you get more done.
Split Screen on Multiple Monitors
If you have multiple monitors connected to your Dell computer, you can split the screen between them to increase productivity and multitasking.
Here’s how you can do it:
- First, make sure that your multiple monitors are connected to your Dell computer correctly. You can check this by going to Settings > System > Display, and you should see both monitors listed under the “Multiple displays” section.
- To split the screen between multiple monitors, you can either drag and drop the windows to the desired monitor, or you can use the keyboard shortcut Windows key + Shift + Left/Right arrow to move the window to the next monitor.
- If you want to split the screen between two windows on different monitors, you can drag and drop the window to the edge of the screen until it snaps into place. You can also use the keyboard shortcut Windows key + Left/Right arrow to snap the window to the left or right side of the screen.
- If you want to use one monitor only and turn off the other monitor, you can go to Settings > System > Display, and under the “Multiple displays” section, select “PC screen only” or “Second screen only” depending on your preference.
By following these simple steps, you can split the screen on multiple monitors and increase your productivity with ease.
Using Keyboard and Mouse for Split Screen
Splitting your screen on a Dell laptop is a great way to increase productivity by allowing you to view two windows simultaneously.
Here are some ways to use your keyboard and mouse to split your screen:
Drag and Drop
One of the easiest ways to split your screen is by using the drag and drop method.
Simply open the two windows you want to view side by side and click and hold the title bar of one window.
Drag the window to the left or right side of the screen until it snaps into place.
Then, drag the other window to the opposite side of the screen.
Corners
If you want to split your screen into four quadrants, you can use the corners.
First, click and hold the title bar of one window and drag it to the upper left corner of the screen until it snaps into place.
Then, click and hold the title bar of another window and drag it to the lower right corner of the screen until it snaps into place.
Arrow Key
Another way to split your screen is by using the arrow key.
First, open the window you want to view on one side of the screen.
Then, press the Windows key + left arrow key to snap the window to the left side of the screen.
Finally, open the second window you want to view and press the Windows key + right arrow key to snap it to the right side of the screen.
Keyboard Shortcut
If you prefer using keyboard shortcuts, you can split your screen using the Windows key + arrow key.
Press the Windows key + left arrow key to snap a window to the left side of the screen and press the Windows key + right arrow key to snap a window to the right side of the screen.
You can also press the Windows key + up arrow key to maximize a window and press the Windows key + down arrow key to minimize a window.
Using your keyboard and mouse to split your screen on a Dell laptop is a quick and easy way to increase productivity.
Try out these methods to find the one that works best for you.
Adjusting Display Settings
Adjusting your display settings can help you optimize your split screen experience on your Dell computer.
Here are some steps to follow:
- Open the Settings app by clicking on the Start menu and selecting Settings. Alternatively, you can press the Windows key + I to open the Settings app.
- Click on System and then select Display.
- You can adjust the resolution of your screen by moving the slider under Resolution. A higher resolution will give you more screen real estate, but the text and icons may appear smaller. On the other hand, a lower resolution will make everything appear larger, but you will have less space to work with.
- You can also adjust the scaling of your screen under Scale and layout. This will determine how large the text and icons appear on your screen. You can choose from different scaling percentages or select Custom scaling to set your own scaling percentage.
- If you have multiple monitors connected to your Dell computer, you can adjust the orientation and layout of your screens by clicking on Multiple displays. You can choose to extend your desktop across multiple screens or duplicate your desktop on each screen.
- If you want to change the orientation of your screen, you can select Orientation and choose from options such as Landscape, Portrait, Landscape (flipped), and Portrait (flipped).
By adjusting your display settings, you can customize your split screen experience on your Dell computer to suit your preferences.
Additional Tips for Split Screen
Split screen is a great way to improve your productivity by allowing you to work on multiple apps or screens simultaneously.
Here are some additional tips to help you get the most out of split screen on your Dell computer:
- Use Snap Windows: Snap Windows is a built-in feature in Windows 10 and 11 that allows you to easily split your screen into two or more windows. To use Snap Windows, simply drag an app window to the side of your screen until you see a transparent outline appear. Then, release the mouse button to snap the window into place. You can also use the Windows key + arrow keys to snap windows quickly.
- Try Snap Assist: Snap Assist is another feature in Windows 10 and 11 that can help you split your screen more efficiently. When you snap a window to one side of your screen, Snap Assist will display a list of other open windows that you can snap to the other side. This can save you time and make it easier to work on multiple apps at once.
- Use a touchscreen: If your Dell computer has a touchscreen, you can use it to split your screen by simply dragging and dropping windows into place. This can be especially useful if you prefer to work with your hands rather than a mouse.
- Connect multiple screens: If you have multiple monitors or a compatible TV, you can connect them to your Dell computer to create an even larger workspace. This can be useful if you need to work on multiple projects at once or if you want to watch a video while you work.
- Take screenshots: If you need to take a screenshot of your split screen setup, you can use the Windows Snipping Tool or the Print Screen key on your keyboard. This can be useful if you need to share your work with others or if you want to save a record of your progress.
- Use HDMI: If you need to connect your Dell computer to an external display, you can use an HDMI cable to do so. This can be useful if you want to work on a larger screen or if you need to present your work to others.
By following these tips, you can make the most of split screen on your Dell computer and improve your productivity.
Troubleshooting Split Screen Issues
Split screen is a useful feature that allows you to view two different applications or windows side-by-side on your Dell laptop.
However, if you are experiencing issues with split screen, it can be frustrating.
Here are some troubleshooting tips to help you resolve split screen issues on your Dell laptop.
Check Compatibility
First, ensure that your Dell laptop is compatible with the split screen feature.
Some older models may not support it. For example, the Latitude 13-7350 laptop does not support split screen.
Check your laptop’s specifications to see if it supports this feature.
Update Your Operating System
Make sure that your operating system is up-to-date.
Split screen may not work properly if your OS is outdated.
Check for updates and install them if available.
Update Video Card Drivers
Outdated video card drivers can cause split screen issues.
Check your video card manufacturer’s website for the latest drivers and download and install them.
Check Connectivity
Ensure that your laptop is properly connected to your external monitor or TV.
Loose or faulty connections can cause split screen issues.
Check the cables and ports for any damage.
Check On-Screen Display Settings
If you are having issues with split screen, check your on-screen display (OSD) settings.
Make sure that the split screen option is enabled and set up correctly.
You can access the OSD menu by pressing the buttons on your monitor.
Uninstall and Reinstall Split Screen Software
If you have installed third-party split screen software, try uninstalling and reinstalling it.
Sometimes, software installation can go wrong, causing split screen issues.
Key Takeaways
Here are the key takeaways to keep in mind when splitting the screen on your Dell laptop:
- Use the Windows + Arrow Keys shortcut to split your screen quickly and easily.
- Adjust the size of the windows by clicking and dragging the border between them.
- Enable Snap Windows and Adjust Windows settings in the Multitasking section of your System settings to make splitting your screen even easier.
- Use split-screen mode to increase productivity by working on two applications or documents side by side.
- Be aware that some applications may not work properly in split-screen mode, so test them out before relying on this feature.
Split-screen mode is a great way to increase your productivity by allowing you to work on two applications or documents side by side.
While it’s easy to use, there are a few tips and tricks that can make it even more efficient.
One of the quickest ways to split your screen is to use the Windows + Arrow Keys shortcut.
This will snap your current window to one side of the screen, and allow you to select another window to fill the other half.
You can adjust the size of the windows by clicking and dragging the border between them.
To make splitting your screen even easier, you can enable Snap Windows and Adjust Windows settings in the Multitasking section of your System settings.
This will allow you to snap windows to specific areas of the screen, and adjust the size of the windows automatically.
Keep in mind that some applications may not work properly in split-screen mode, so it’s a good idea to test them out before relying on this feature.
With these tips, you’ll be able to split your screen like a pro and increase your productivity in no time!