


To have new viewers, it’s crucial to post your highlights from the streams on platforms like YouTube and TikTok.
This is where Streamlabs OBS comes in handy, as it provides free recording capabilities for gaming and allows you to take the screen in HD resolution.
By uploading your stream highlights to these platforms, you can raise your following and keep your content available indefinitely for people to discover and enjoy.
And with that arises the question, where does Streamlabs save recordings?
Post Contents
Where Does Streamlabs Save Recordings?
If you’ve spent a long time recording some fantastic gameplay in Streamlabs OBS but can’t seem to find the resulting footage, you’re not alone.
It can be frustrating to put in the time and effort to create a recording only to have it go missing.
To help you out, here’s a guide on locating and changing the location of your recorded videos on your computer.
Follow these steps, and you’ll be able to find your recordings in no time.
- Open Streamlabs Studio
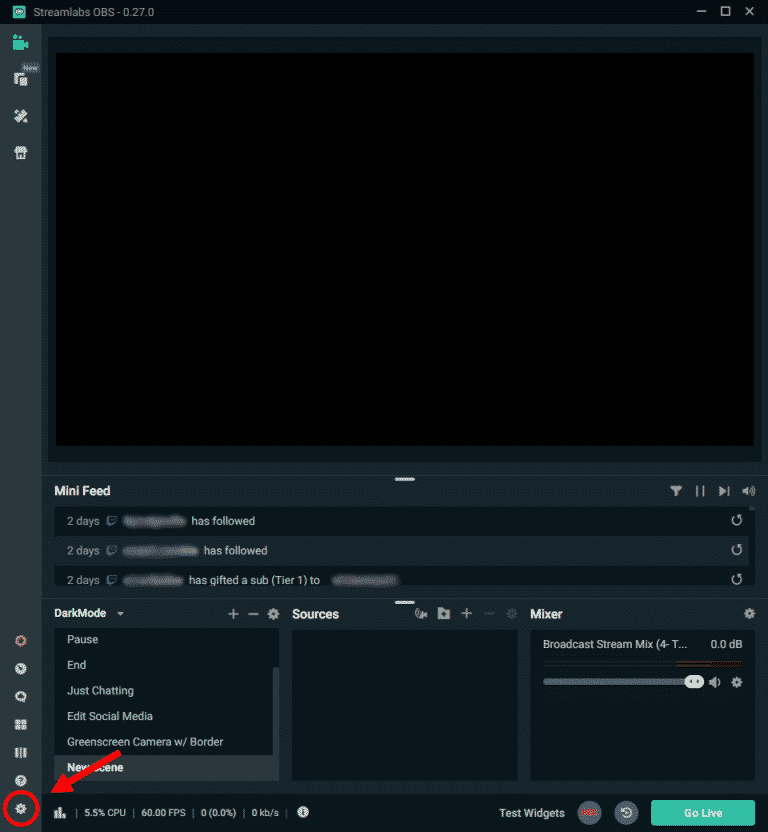
- Go to the “COG” section
- On the left side of the screen, select “Output.”
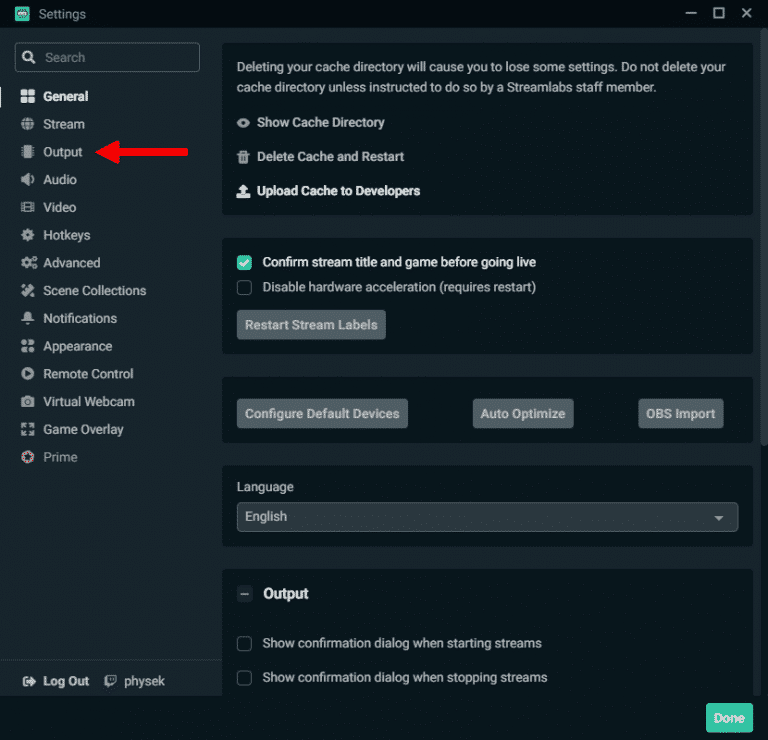
- Scroll all the way down and look out for the recording path
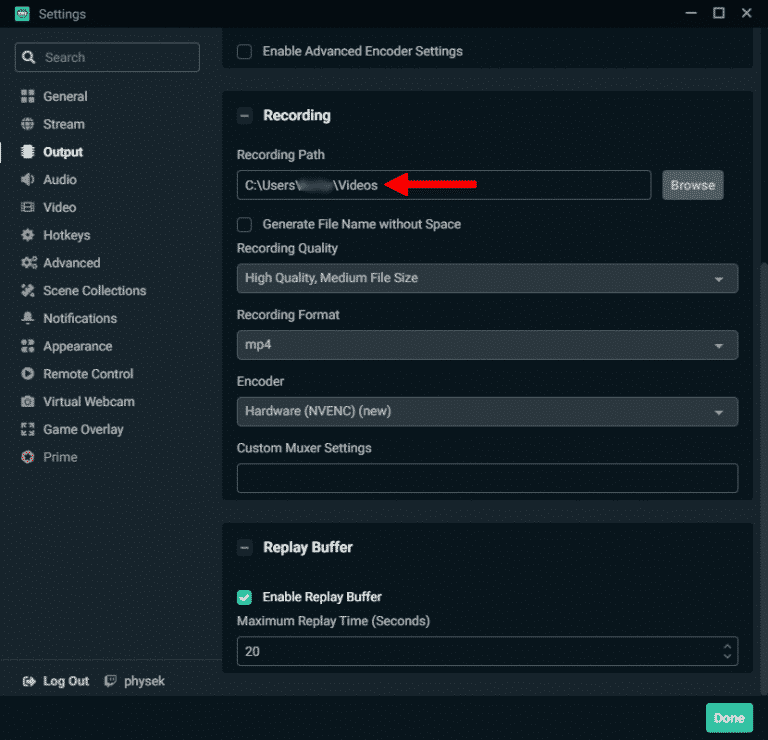
- Open the “File Explorer” on your computer
- Paste the link
This should bring you to the folder where your recordings are stored.
Remember that the specific location may vary depending on your settings and preferences.
How to Change the Streamlabs Recordings Location
If you want to change the location where it saves your recordings to free up space on your hard drive, you can follow these steps:
- In the OBS Studio, click on the “COG Settings” button
- The Settings dialog box will appear
- Under the Output tab, locate the “Recordings” section
- Click the “Browse” button and choose a new location for OBS to store your recordings
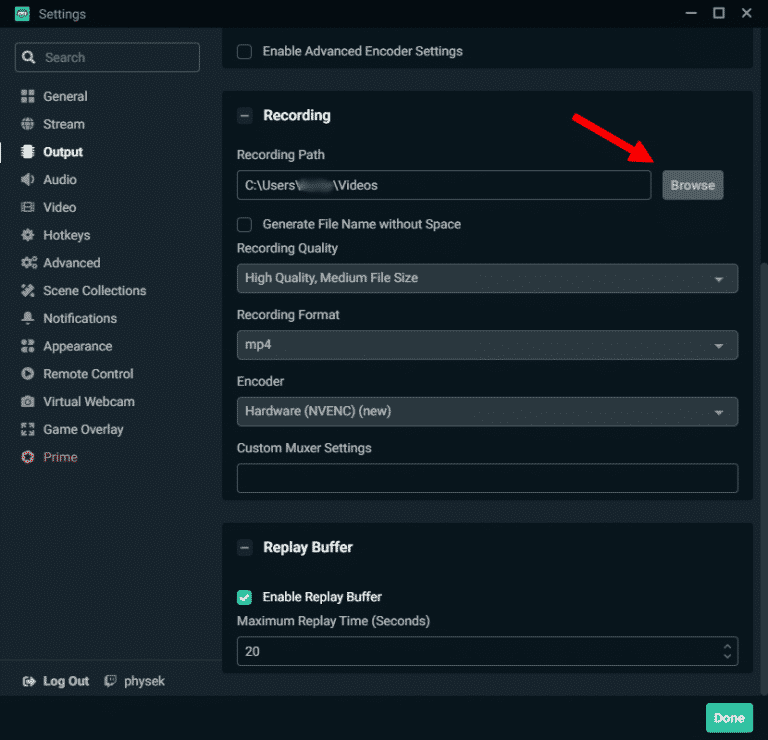
- Select your preferred folder and press “OK” to confirm the change
Keep in mind that OBS recordings can take up a significant amount of storage space, especially if your streams are long, so choosing a location with plenty of available space may be helpful.
How to Save Your Recordings in Streamlabs Desktop
It offers several options for recording your gameplay, depending on your specific needs.
If you’d like to take a particular record or clip a stream session, a tool is available to suit your purpose.
Highlighter
Streamlabs Desktop allows you to use Replay Buffer and Highlighter to create and upload highlight videos to your YouTube channel without leaving the app.
Highlighter is a handy editing tool for the streamers that simplifies the creation of highlighting your videos from your live replays.
It’s simple, with just a couple of clicks, you can edit and share the highlights directly on YouTube, making them available to your friends and viewers as soon as the stream ends.
This feature makes it easy to share your best moments with others and keep your content fresh and engaging.
Replay Buffer
This convenient feature automatically allows you to record the last few minutes of the live stream.
This tool will enable you to customize the amount of footage you’d like to capture and even add an instant replay feature to your stream.
This way, your viewers can watch a replay of your content in real time.
This feature helps capture important or memorable moments in your streams and is easy to use.
Simply specify the desired length of time and set up the instant replay source, and Replay Buffer will do the rest.
Record your gameplay
If you want to capture your entire gaming session and create professional-quality highlights, consider using dedicated editing software like Premier Pro or Divinci Resolve.
These tools offer more advanced effects and transitions but take more time to use.
If you would like to improve the overall quality of your recordings, it may be worth the extra effort.
To record your session using Streamlabs Desktop, navigate to the red recording button located next to “Go Live.”
This will capture everything displayed in your editor within Streamlabs Desktop.
Remember that recording your entire gaming session will require more storage space, so have sufficient space available on your hard drive.
Frequently Asked Questions
Can You Record with The Streamlabs without Streaming?
You can use Streamlabs to record your gameplay without actually broadcasting it.
To do this, click on the “REC” button in the lower right corner of the Streamlabs interface. This will begin a recording that is saved locally on your computer.
During the recording process, you can also take advantage of features like toggling between scenes or cameras, just as you would when broadcasting.
This allows you to create high-quality recordings without streaming them live.
Does Streamlabs Automatically Save My Recordings?
The Replay Buffer is a handy tool for streamers using Streamlabs Desktop.
It automatically records the last few minutes of your live stream, allowing you to set the time you want to capture.
You can also include an instant replay source in your stream, allowing your viewers to watch a replay of your stream in real time.
This can be useful for highlighting key moments or allowing your audience to catch up on anything they missed.
Why Is Streamlabs Not Saving My Recordings?
If you have trouble recording in Streamlabs, you can try a few things to fix the issue.
First, ensure that your user account has permission to write to the recording path you are using.
It’s also good to check that you have enough free disk space.
Finally, try running Streamlabs as an administrator, which can sometimes resolve recording issues.
Conclusion
Streamlabs provides various tools and options for recording and sharing your gameplay, allowing you to create and share content that best suits your needs.
It’s important to note that Streamlabs OBS is just one of several tools you can use for recording streams, and the location of recordings may vary depending on the tool being used.
However, the general principle of saving recordings in a designated folder within the application directory or allowing the user to specify a custom location is similar across different tools.