


If you’re a new owner of a Nest thermostat, you might be wondering how to turn on Nest Thermostat.
The good news is that it’s a straightforward process that won’t take you long to master.
In this article, we’ll guide you through the steps you need to follow to turn on your Nest thermostat manually.
Before you start, it’s worth noting that Nest thermostats are designed to learn your schedule and preferences over time.
This means that once you’ve set it up and connected it to your Wi-Fi network, it will start adjusting the temperature based on your routines.
However, if you prefer to control your thermostat manually,
you can easily switch to manual mode and start adjusting the temperature yourself.
In the next section, we’ll show you how to turn on your Nest thermostat manually and how to adjust the temperature using the touch screen.
We’ll also provide some tips on how to save energy by setting up a schedule and using the Eco mode.
So, let’s get started!
Post Contents
Step 1: How to Turn on Nest Thermostat to Check Compatibility
If you’re thinking about installing a Nest Thermostat, the first thing you need to do is check if it’s compatible with your HVAC system.
Here are a few steps to help you determine compatibility:
- Use the Nest Compatibility Checker: Nest offers an interactive tool that can help you determine if your system is compatible with their thermostats. You’ll need to provide some basic information about your HVAC system, such as the type of heating and cooling you have, and the wires that are currently connected to your thermostat. The tool will then recommend which Nest Thermostat models will work with your system.
- Check your HVAC system’s compatibility: You can also check your HVAC system’s compatibility by looking at the wires connected to your current thermostat. If you see wires labeled “R,” “C,” “Y,” “W,” and “G,” your system is likely compatible with Nest Thermostats. However, if you see wires labeled “B,” “O,” or “X,” your system may not be compatible.
- Consult a professional: If you’re unsure about whether your HVAC system is compatible with Nest Thermostats, it’s always a good idea to consult a professional. They can help you determine compatibility and recommend the best thermostat for your system.
Checking compatibility is an important first step in installing a Nest Thermostat.
By making sure your system is compatible, you can ensure a smooth installation process and avoid any potential issues down the line.
Step 2: Install the Nest Thermostat
Now that you have turned off the power to your HVAC system, it’s time to remove your old thermostat and install the Nest thermostat. Follow these steps:
Subsection 1: Turn off Power to Your HVAC System
Before you start, make sure the power to your HVAC system is turned off. This will help prevent any electrical shock or damage to your system. Follow these steps:
- Locate your circuit breaker box and find the breaker that controls your HVAC system.
- Flip the switch to the “off” position.
Subsection 2: Remove Your Old Thermostat
Now that the power is off, you can safely remove your old thermostat. Follow these steps:
- Remove the cover of your old thermostat.
- Unscrew the mounting plate from the wall.
- Disconnect the wires from the old thermostat.
- Remove the mounting plate from the wall.
Subsection 3: Install the Nest Thermostat
With the old thermostat removed, it’s time to install the Nest thermostat. Follow these steps:
- Place the Nest base plate on the wall where you want it to go.
- Use a level to make sure the base plate is straight.
- Mark the location of the two screws on the wall.
- Drill holes for the screws.
- Insert the screws into the wall.
- Attach the Nest base plate to the wall using the screws.
- Connect the wires to the appropriate terminals on the Nest base plate.
- Push the wires into the base plate.
- Attach the Nest thermostat to the base plate by aligning the connectors and turning it clockwise.
Once you have installed the Nest thermostat, you can turn the power back on to your HVAC system by switching the breaker back on.
Your Nest thermostat will guide you through the setup process.
Step 3: Connect the Nest Thermostat to Wi-Fi
Now that you have installed the Nest Thermostat, the next step is to connect it to your Wi-Fi network. This will enable you to control your thermostat remotely using your smartphone or tablet.
Subsection 1: Download the Nest App
The first step in connecting your Nest Thermostat to Wi-Fi is to download the Nest app on your smartphone or tablet.
The app is available for free on the App Store and Google Play Store.
Once you have downloaded the app, create an account or sign in with your existing Nest account.
Subsection 2: Connect the Nest Thermostat to Wi-Fi
Follow these steps to connect your Nest Thermostat to Wi-Fi:
- Press the thermostat to open the main menu.
- Select “Settings” and then “Network”.
- Select your Wi-Fi network from the list of available networks.
- Enter your Wi-Fi network password and select “Done”.
After a few seconds, your Nest Thermostat will connect to your Wi-Fi network.
You can now control your thermostat remotely using the Nest app on your smartphone or tablet.
If your Wi-Fi network is hidden, follow these steps:
- Press the thermostat to open the main menu.
- Select “Settings” and then “Network”.
- Select “Other Wi-Fi Network”.
- Enter your Wi-Fi network name and password.
- Select the security type for your Wi-Fi network and select “Done”.
After a few seconds, your Nest Thermostat will connect to your hidden Wi-Fi network.
You can now control your thermostat remotely using the Nest app on your smartphone or tablet.
Step 4: Set Up the Nest Thermostat
Now that you have installed the Nest Thermostat, it’s time to set it up. This step is crucial as it will allow you to control the temperature in your home and save energy.
Follow the steps below to set up your Nest Thermostat.
Subsection 1: Create a Nest Account
The first step is to create a Nest account if you don’t already have one. You can do this by downloading the Nest app on your smartphone or tablet and following the instructions to create an account.
Alternatively, you can create an account on the Nest website.
Once you have created an account, you will need to log in to the Nest app or website to set up your thermostat.
Subsection 2: Follow the On-Screen Prompts to Set Up Your Nest Thermostat
Once you have logged in to your Nest account, follow the on-screen prompts to set up your Nest Thermostat.
You will be asked to enter some basic information, such as your location and the type of heating and cooling system you have.
You will also be asked to connect your Nest Thermostat to your Wi-Fi network. Make sure you have your Wi-Fi network name and password handy before starting this step.
After you have connected your Nest Thermostat to your Wi-Fi network, the app or website will walk you through the process of setting up your temperature schedule.
This is where you can set the temperature for different times of the day and week, and create a schedule that works for you.
Once you have completed the setup process, your Nest Thermostat will be ready to use.
You can control the temperature in your home using the Nest app on your smartphone or tablet, or by using the Nest website on your computer.
Remember, the Nest Thermostat is designed to learn your temperature preferences and adjust accordingly.
Over time, it will create a schedule that works for you and help you save energy.
Step 5: Adjust Settings and Preferences
Now that you’ve successfully turned on your Nest Thermostat, it’s time to adjust the settings and preferences to your liking.
Here are some sub-sections to help you customize your thermostat:
Subsection 1: Adjust Temperature Settings
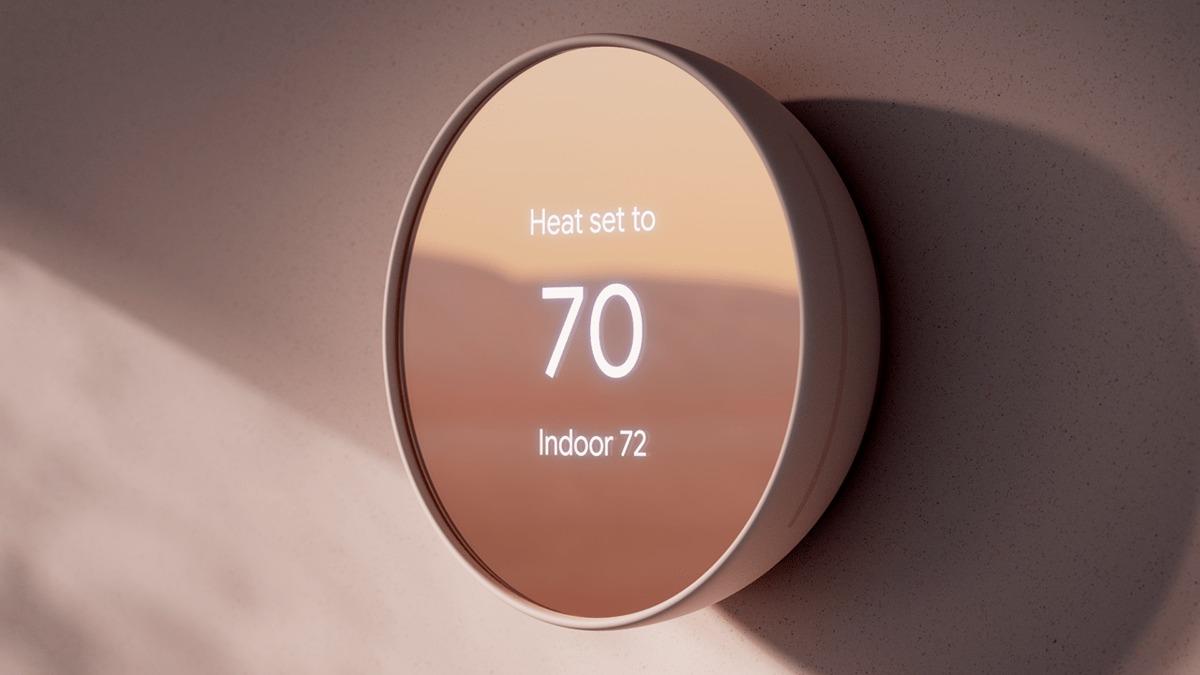
One of the most important settings to adjust is the temperature. You can easily change the temperature by turning the ring on your thermostat or by using the Nest app on your phone.
You can also set a target temperature for each day of the week. Here’s how:
- Tap on the thermostat display to bring up the menu.
- Select “Schedule”.
- Select the day of the week you want to adjust.
- Set the target temperature for each time period.
- Repeat for each day of the week.
Subsection 2: Set Up Schedules and Routines
If you want your thermostat to automatically adjust based on your routine, you can set up schedules and routines.
For example, you can set up a routine that turns down the temperature when you leave for work and turns it back up when you come home. Here’s how:
- Tap on the thermostat display to bring up the menu.
- Select “Schedule”.
- Select “Add Schedule”.
- Choose the days and times you want the schedule to apply.
- Select the temperature settings for each time period.
- Save the schedule.
Subsection 3: Customize Your Nest Thermostat
There are many other settings and preferences you can customize on your Nest Thermostat. Here are a few examples:
- Adjust the brightness of the display.
- Choose between Fahrenheit and Celsius.
- Set up alerts for when your furnace filter needs to be changed.
- Enable or disable features like “Early-On” and “Cool to Dry”.
To access these settings, simply tap on the thermostat display to bring up the menu and select “Settings”. From there, you can explore the different options and adjust them to your liking.
Key Takeaways
Turning on your Nest thermostat is a simple process that can be done manually or through the Nest app. Here are the key takeaways:
- To turn on your Nest thermostat manually, press the ring to wake up the display and select “Home” from the main menu.
- Then, click “Settings” and turn on the “Alert me when…” setting to receive error alerts.
- If you prefer to use the Nest app, download it on your Apple iPhone or Android device and connect your thermostat to your account using the entry key.
- The entry key can be found by pressing the ring to open the Quick View menu and selecting “Settings” and then “Nest app.”
- Once your thermostat is connected to your account, you can control it remotely and receive notifications about any issues.
- Remember to set temperature schedules to save energy and troubleshoot any common issues that may arise.
With these key takeaways in mind, you should feel confident in your ability to turn on and use your Nest thermostat effectively.