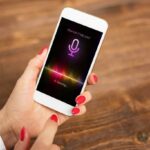


Smartphones have become an essential part of our daily lives, and one of the most common features we use is the microphone.
Whether it’s for recording voice notes, making phone calls, or using voice assistants, it’s crucial to know how to enable the microphone on your iPhone.
While most apps will request microphone access during their initial setup, there might be times when an iPhone user needs to grant or revoke access manually.
In this article, we will guide you through the steps on how to turn on microphone on iPhones, allowing you to make the most out of your device’s audio capabilities.
By following the process described in this guide, you’ll be able to control which apps have access to your iPhone’s microphone, ensure your privacy, and optimize your device’s microphone usage according to your needs.
Post Contents
How to Turn on Microphone on iPhone: Checking iPhone’s Settings for Microphone Access
When learning how to enable the microphone on an iPhone, it is essential to check the device’s settings to ensure microphone access is granted to the necessary apps.
This section will guide readers through the process of opening the Settings app and navigating to the Privacy and Microphone settings.
Opening the Settings App
To begin, locate the Settings app on the iPhone’s home screen or within the Utilities folder. It is represented by a gray gear icon.
Tap on the icon to open the Settings app, which contains various options and settings for the device.
After opening the Settings app, scroll down and find the Privacy option, which has an icon of a hand beside it.
Tap on Privacy to proceed into the privacy settings panel where different hardware and software settings can be controlled.
In the Privacy section, look for the Microphone option, symbolized by a microphone icon.
Tapping on this option will open a list of apps that have requested access to the device’s microphone.
From there, users can manage the access permissions for each app in the list, turning access on or off as needed.
For example, if a user wants to grant or revoke microphone access for a specific app, they can simply toggle the switch next to the app’s name.
When the switch is green, the app has access to the microphone, and when it is gray, the access is denied. Once the desired changes are made, the new settings will be applied automatically.
By following these instructions, users can easily check and manage microphone access for their iPhone, ensuring that the microphone is available when needed while maintaining control over which apps can use it.
Adjusting Microphone Settings for Individual Apps
On an iPhone, users might want to adjust the microphone settings for individual apps. This allows them to control which apps have access to the device’s built-in microphone.
This section will guide users through finding an app’s settings and enabling microphone access for that app.
Finding the App’s Settings
To find the settings for an individual app, users need to follow these steps:
- Open the Settings app on the iPhone.
- Scroll down the list of settings until the desired app is found. App settings are typically listed in alphabetical order.
- Tap on the app’s name to access its specific settings.
It’s important to note that not all apps will have settings available through the main Settings app. In such cases, users should refer to the in-app settings or contact the app developers for assistance.
Enabling Microphone Access
Once the app’s settings are open, users can enable microphone access by following these steps:
- Look for a section named Microphone or Privacy.
- If a Microphone section exists, simply toggle the switch next to it to allow the app to access the iPhone’s microphone.
- If the Privacy section is present, tap on it, and then find the Microphone option in the list that appears.
- Toggle the switch next to Microphone to enable access for the app in question.
Once these steps are complete, the app should now have access to the iPhone’s microphone.
Users can test the functionality within the app or refer to the app’s help section for further assistance.
Troubleshooting Common Microphone Issues
In this section, we will discuss some common microphone issues and provide helpful tips to solve them.
We will cover three main troubleshooting steps, including restarting your iPhone, checking for iOS updates, and inspecting for hardware damage.
Restarting Your iPhone
Restarting your iPhone is an effective solution to address various issues, including microphone problems. To restart your device, follow these steps:
- Press and hold the Power button until the “slide to power off” slider appears on the screen.
- Swipe the slider to turn off your iPhone.
- Wait for 30 seconds, then press and hold the Power button again until the Apple logo appears.
Once your iPhone restarts, test the microphone to see if the issue is resolved.
Checking for iOS Updates
Outdated software can cause various issues, including problems with your iPhone’s microphone.
Ensure your device is running the latest version of iOS to fix potential bugs and enhance its performance.
To check for updates, follow these steps:
- Open the Settings app on your iPhone.
- Tap on General.
- Select Software Update.
- If an update is available, tap on Download and Install.
After updating your iPhone, test the microphone to verify if the issue has been resolved.
Inspecting for Hardware Damage
If the aforementioned steps do not solve the microphone issue, it’s possible that there is hardware damage.
Here’s how to examine your device for potential hardware problems:
- Check the microphone openings for lint or dust blockages, and clean them gently with a soft brush or compressed air.
- Inspect your iPhone for any visible signs of damage, such as dents or cracks, that could affect the microphone’s functionality.
- If you’re using a protective case or screen protector, remove it and test the microphone to determine if the issue persists.
If none of these suggestions resolve your microphone problems, consider contacting Apple Support or visiting an Apple Store for further assistance.
Contacting Apple Support
If the user has followed the previous sections and is still unable to enable the microphone on their iPhone, contacting Apple Support may be the best next step.
Apple offers various ways to reach their support team, ensuring that users can quickly find the assistance they need.
One option is to visit the Official Apple Support website, where users can find information about their specific device and issue.
The user can initiate a live chat with an Apple Support representative, who can walk them through some troubleshooting steps or suggest alternative solutions.
Alternatively, users can also call the Apple Support phone number for their country or region. The phone numbers for different locations can be found on the Apple Contact page.
By calling, users can talk directly to an Apple Advisor who will help them diagnose and resolve the issue with their iPhone microphone.
Furthermore, the Apple Community is an online forum where users can search for similar issues or post their own question to seek help from other iPhone users who may have faced the same problem.
This can be a valuable resource when troubleshooting microphone issues, as it allows users to benefit from the shared experiences and solutions of others.
In summary, when users are unable to resolve the issue with their iPhone microphone, they can turn to Apple Support for assistance.
By using the official support channels or seeking help from the Apple Community, users can likely find a solution that will enable the microphone on their iPhone.