Are you a gaming enthusiast looking to test your streaming skills on Twitch?
Whether you’re a seasoned pro or just starting, it’s always a good idea to ensure everything works correctly before you go live.
Here’s how to test stream on Twitch and ensure a smooth and successful broadcast.
Post Contents
How to Test Stream on Twitch
As a streamer, it’s essential to ensure that your live streams are stable and free from technical issues.
One of the best ways to do this is by performing a test stream on Twitch, which allows you to evaluate the overall quality of your video, audio, and broadcast.
By testing all of the factors that could impact your stream, you can identify any problems and make adjustments before going live.
You’ll need to use the Twitch Inspector tool to run a stream test on Twitch.
This software helps you manage your streaming settings and ensure you set up everything.
With the Twitch Inspector, you can test your stream’s video and audio quality and check for any potential problems with your broadcast.
Before you go live, run a stream test to identify any issues.
This will allow you to make necessary adjustments and ensure that your stream is as smooth and stable as possible.
By testing your stream, you can avoid unstable events and provide your audience with a high-quality viewing experience.
1. Open Your Twitch Account
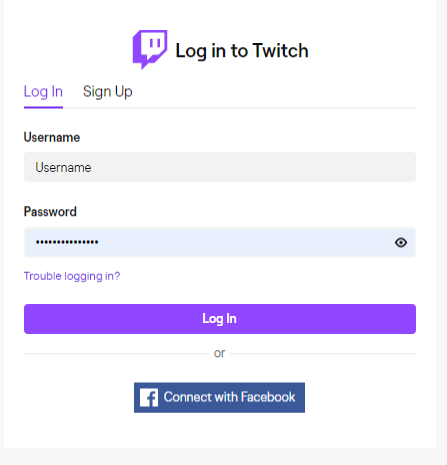
Before you can test your stream on Twitch, you’ll need to log in to your account using a computer.
This is important because you’ll be using dedicated streaming software, which may not be compatible with other devices, such as tablets or smartphones.
To log in to your Twitch account, simply visit the website and enter your login information as you usually would.
Use a PC or Mac to access the site, as this will ensure you have the necessary tools and resources to set up and test your stream.
2. Go to Inspector Tool
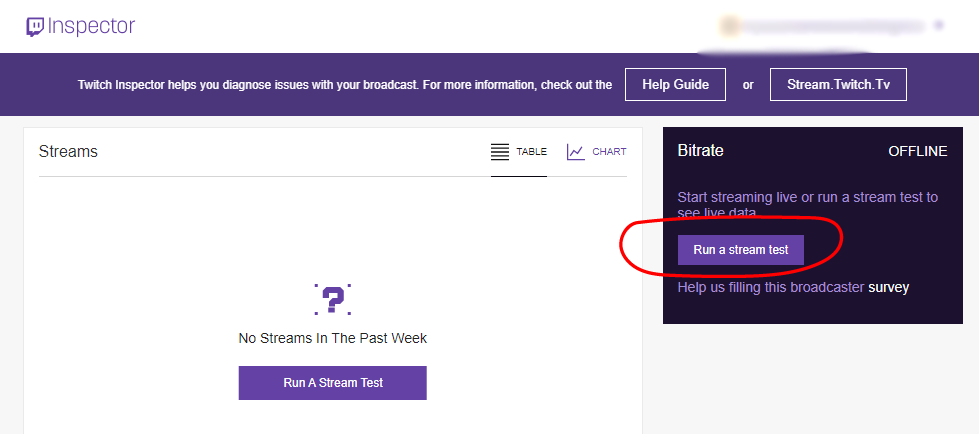
After logging in to your Twitch account, the next step is to access the Twitch Inspector tool.
This valuable resource will provide important information about your stream settings and help you identify any potential issues or problems.
To use the Twitch Inspector, simply login to the tool using the same login information you used to access your Twitch account.
This will allow you to view and manage your stream settings and better understand what works and what doesn’t when it comes to streaming.
3. Open OBS
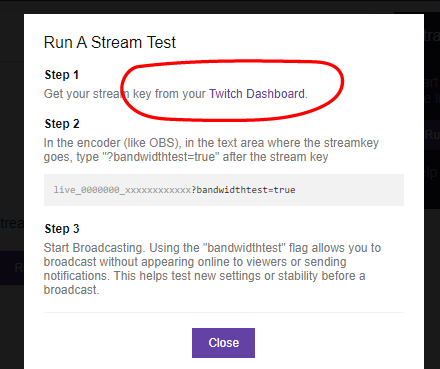
Once you’ve logged in to your Twitch account and accessed the Twitch Inspector tool, it’s time to open your streaming software.
There are different options, but OBS (Open Broadcaster Software) is widely considered the most popular and reliable choice.
Before streaming, open OBS and familiarize yourself with its various settings and options.
This will help you stream more effectively and ensure that your broadcasts are of the highest quality.
4. Copy the Stream Key to The Dashboard
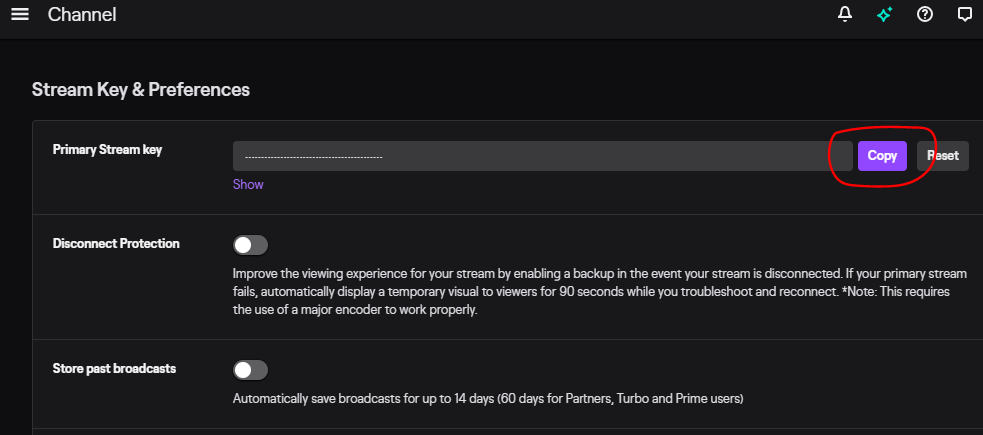
To begin testing your stream on Twitch, you’ll need to access your stream key, a private code connected to your channel.
To do this, log in to your Twitch account and navigate the Creator Dashboard by clicking on the “Settings” button.
Once you’re in the Creator Dashboard, look for the “Stream” tab on the left side of the screen.
In this section, you’ll see an option labeled “Stream Key.” Click on this option to access your stream key.
Copy the stream key and keep it on your clipboard. You’ll need this code later when you set up your streaming software and begin testing your stream.
5. Paste the Key

Now that you’ve obtained your stream key from Twitch, it’s time to connect it to your streaming software.
To do this, open OBS and navigate the “Settings” menu. In this section, you’ll see a button labeled “Use Stream Key.”
Click on this button to access the stream key settings.
Once you’re in the stream key settings, you’ll need to paste the code you copied earlier from Twitch.
This will allow OBS to connect to your Twitch account and begin broadcasting.
6. Click the “Start Streaming” Button
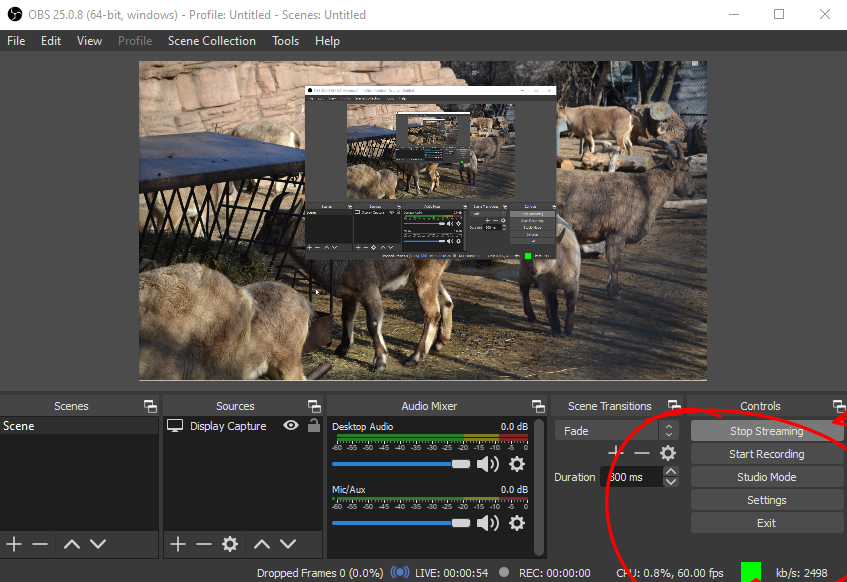
With your stream key set up and connected to OBS, it’s time to start testing your stream on Twitch.
To begin broadcasting, click on the “Start Streaming” button in OBS.
This will initiate the stream and cause a live green box to light up on your screen, indicating that you are now streaming.
Keep in mind that at this point, only you will be able to see your stream.
This is because the stream key is private and only allows you to perform a test broadcast that you can only view.
You’ll need to go to the Twitch Inspector tool to get more information about your stream and check for any issues or problems.
This software will provide valuable insights into your stream’s performance and help you identify any areas that need improvement.
7. Check the Quality and Stability
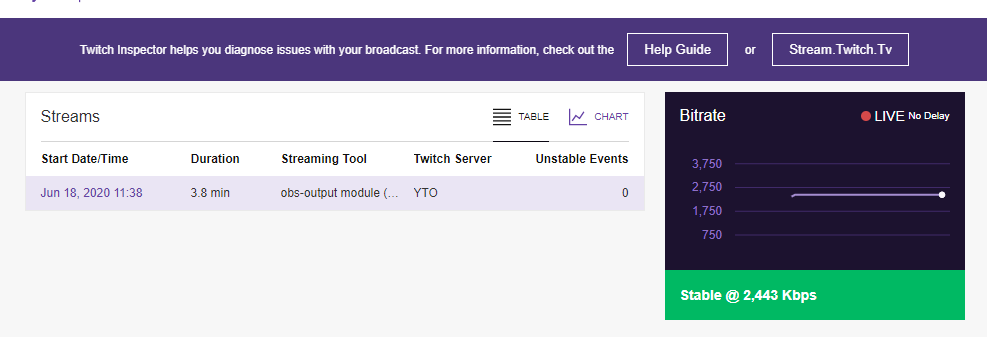
After setting up and testing your stream on Twitch, it’s crucial to ensure that your internet connection is stable and capable of handling the demands of live streaming.
To do this, you can use the Twitch Inspector tool to run a bandwidth test or internet speed test.
By performing these tests, you’ll be able to determine how well your connection is working and identify any potential issues that could impact the quality and stability of your stream.
This is especially important if you want to avoid unexpected problems or disruptions during live broadcasts.
To run a bandwidth or internet speed test, go back to the Twitch Inspector and follow the prompts.
The platform will provide detailed information about your connection and help you identify areas that need improvement.
Why You Need to Make a Test Stream Before Streaming
While running a test stream on Twitch is not strictly necessary, it’s always a good idea to ensure that your stream is set up and functioning correctly before going live.
This way, you can identify and troubleshoot any issues that might arise and ensure that your stream is of the highest quality.
Twitch recommends that new users test their streams before going live for a good reason.
Even though Twitch’s servers are generally stable, it’s always better to be prepared and avoid unexpected problems.
By testing your stream, you can check the video data, audio, and overall quality of your broadcast and make any necessary adjustments.
There are several benefits to running a test stream, including the following:
- Testing the stability of your games: If you play a game on a test stream before going live, you’ll be able to see if it performs well and runs smoothly. This can help you avoid any issues during your live stream
- Identifying technical difficulties: If there are any technical issues with your Twitch channel, a test stream will allow you to spot them before your viewers see them. This can help you maintain the integrity and reliability of your channel and encourage more people to donate and support your efforts
Conclusion
Learning how to test stream on Twitch is an innovative and proactive way to ensure that your live streams are of the highest quality and free from technical issues.
By taking the time to test your stream, you can provide your audience with a seamless and enjoyable viewing experience.


