As a streamer, you have put in time and effort to build your audience.
Thousands of people tune in to your stream while you do your favorite thing, such as video gaming, cooking, or making art.
The viewers enjoy your channel, your videos, and your commentary.
But how can you keep your audience engaged and entertained while offline? Here’s an easy solution: Twitch hosting! Read on to find out how to host on Twitch!
Post Contents
What is Twitch Hosting?
Hosting on Twitch means running someone else’s live stream on your channel.
Viewers find another streamer’s content when they go to your channel instead of yours.
They can also interact with the streamer through your chat.
Hosting another channel works best if you are too tired to stream or have other things to do.
This mutual collaboration helps both channels (yours and the one you hosted).
Your audience gets to watch new content while you are away. The account you host gets new viewers and followers.
Moreover, you set yourself up for cross-promotion, increasing your audience.
Now that we have covered what Twitch hosting is, let’s learn how to do it.
How To Host On Twitch?

Whether you are using a desktop or mobile, hosting on Twitch is easy. There are two ways of doing it: manual and automatic.
Manual hosting is when you write a command to host another streamer on your channel.
Similarly, you need to put in the command to un-host the stream.
For the second way, there’s a feature in Twitch called Auto Hosting.
It allows you to set up a list of channels that will be automatically hosted when you are offline.
Here, we will discuss three ways to host other channels on your account for collaboration and marketing purposes.
Hosting On Twitch Through Desktop
Follow these step-wise instructions to host another channel on your PC or Mac. Let’s get started!
- Go to Twitch, and log in to your account.
- Click on the Profile icon in the top-right corner,
- From the drop-down menu, select Channel to go to your Twitch channel.
- Once on your channel, click the Chat option to open a chatbox window.
- Now, type in the channel’s username you intend to host with the command: /host. (Example: /host Patrick’s Gaming).
- Done! Your channel will now feature the channel you commanded.
- To end the hosting, write the command: /unhost in the chat box. The hosting will stop, and the screen will return to your status, whether streaming or offline.
Note: You can host one channel at a time. Also, three host commands are allowed within 30 minutes.
If you host and unhost a channel and host another, you will have to wait 30 minutes from the first command to stop the hosting.
Hosting On Twitch Through Mobile
As we said, hosting on Twitch is quite simple. You can also set up hosting on your phone if you are away from your streaming station.
You can follow similar steps to host on mobile as hosting on desktop. Type the command: /host with the channel’s username in the chat box.
However, there is another method that is a lot simpler.
- Open the Twitch app on your phone.
- Go to the streaming you want to host.
- Click on the Share icon on top of the streaming window.
- A small pop-up screen will appear. Select the option with Host Channel (channel’s name).
- That’s it! Your channel will now feature hosted live streaming.
Auto Hosting
Auto-Host is an amazing feature, especially if you are away for a long time. It helps maintain your channel’s viewership and keeps your audience engaged.
So when you get back to streaming, your channel has retained followers.
You can select multiple channels for auto-hosting, randomly and per your preference.
Here’s how to do it!
1. Enter your credentials to log in to your Twitch account.
2. In the top-right corner, click on your Profile icon.
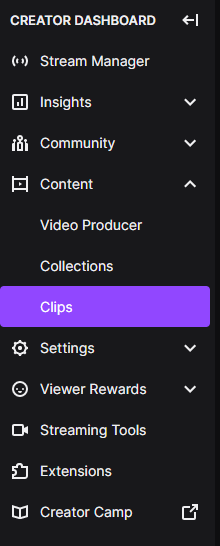
3. Select Creator Dashboard from the drop-down menu.

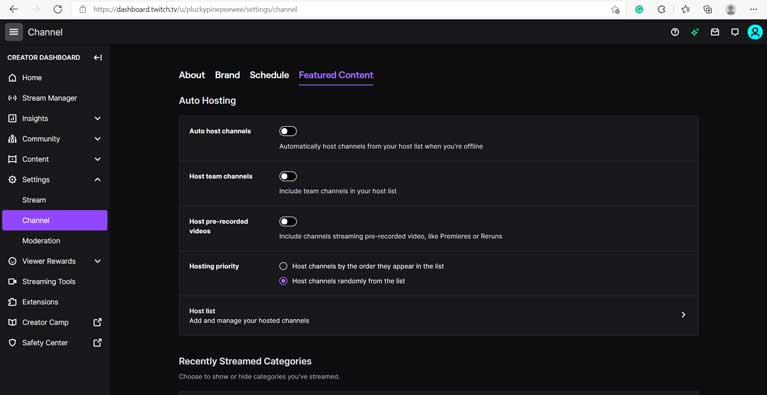
4. Now, click on Setting from the left-hand menu on the dashboard.
5. Click Channel from the small drop-down list.
6. Now, open the Featured Content tab on the Channel page.

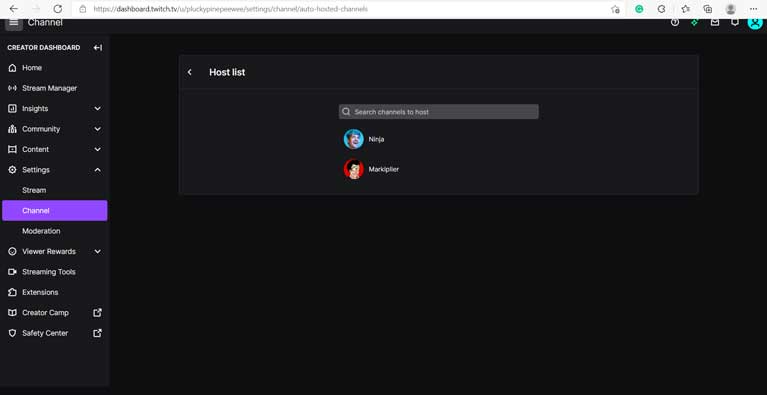
7. From the Auto Hosting feature, click the Host List to add or manage the hosted channels.

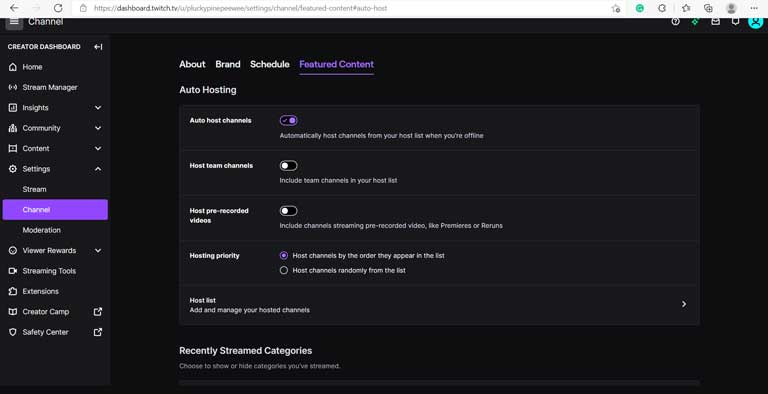
8. Select your Hosting priority, whether you want them in the order or on random.
9. Now click the Auto host channels option to turn it on.

10. That’s it! Your channel will now automatically host channels from your host list.
Benefits Of Hosting On Twitch
Hosting on Twitch is a common form of collaboration among streamers.
Not only it allows your hosted channel to increase viewers, but it also offers tons of benefits to your channel.
1. Engages Your Audience
Hosting other live streamings on your channel helps you keep the channel running.
It engages your audience while you are offline and does not let your account’s reach die down.
Moreover, you can tell your audience more about yourself by bringing in streams on different topics.
It will engage your audience and build a loyal community.
2. Improves Your Image
If you have a well-established following on Twitch, you can help small streamers grow their audience through your platform.
Not only it gets appreciation from the viewers but also the Twitch itself.
3. Increases Visibility
When you host other channels on your account, you appear in the ‘live hosting’ section along with the ‘live channel’ section.
It increases your visibility, attracts new viewers, and improves your channel’s reach.
4. Cross-Promotions
Hosting others’ live streamings means other channels also hosting yours. It, in turn, increases your channel’s viewership and gets more audience.
As we said above, it’s a win-win for both parties!
In the End!
Now that you know how to host on Twitch, we suggest wasting no time and getting to it immediately.
Hosting on Twitch boosts not only the hosted channels but also improves your channels’ reach.
There are easy ways to host on Twitch through the website and mobile applications.
Follow this guideline and start collaborating with your fellow streamers!


