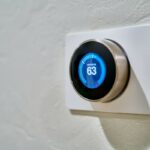


If you’re a proud owner of a Nest thermostat, you know how convenient it is to have a device that allows you to control the temperature of your home with ease.
However, like all electronic devices, your Nest thermostat will eventually need to be recharged.
Knowing how to charge Nest thermostat is important to keep it functioning correctly and avoid any unnecessary downtime.
There are a few different methods you can use to charge your Nest thermostat, depending on the model you have and the resources available to you.
One option is to use the USB port on the back of your Nest Learning Thermostat or Nest Thermostat E to charge it up when the battery is low.
Another option is to use a common wire for Nest if you have checked to make sure your power is on at your HVAC system and you’ve charged the thermostat manually by taking it off the wall and plugging it in.
Regardless of the method you choose, it’s important to follow the proper steps to ensure your Nest thermostat charges correctly and efficiently.
In this article, we’ll go over the different methods for charging your Nest thermostat and provide step-by-step instructions to help you get your device back up and running in no time.
Post Contents
How to Charge Nest Thermostat: A Quick Guide
If your Nest Thermostat battery is low, you can charge it in two ways: using a USB cable or using the Nest Stand. Here’s how to do it:
Using a USB Cable
To charge your Nest Thermostat using a USB cable, follow these simple steps:
- Remove the Nest Thermostat from the wall mount.
- Connect the USB cable to the USB port on the back of the Nest Thermostat.
- Connect the other end of the USB cable to a USB power source, such as a computer or a USB wall charger.
- The Nest Thermostat will start charging automatically.
- Once the battery is fully charged, disconnect the USB cable and reattach the Nest Thermostat to the wall mount.
Using the Nest Stand
If you have a Nest Thermostat E, you can charge it using the Nest Stand. Here’s how to do it:
- Remove the Nest Thermostat E from the wall mount.
- Place the Nest Thermostat E on the Nest Stand.
- Connect the Nest Stand to a power source using the included power adapter.
- The Nest Thermostat E will start charging automatically.
- Once the battery is fully charged, remove the Nest Thermostat E from the Nest Stand and reattach it to the wall mount.
Checking the Battery Level
Removing the Thermostat from the Base
If you want to check the battery level on your Nest thermostat, the first thing you need to do is remove it from the base. Here’s how:
| Step 1 | Press down on the Nest display to bring up the menu. |
| Step 2 | Select “Settings” from the menu. |
| Step 3 | Select “Technical Info” from the Settings menu. |
| Step 4 | Select “Power” from the Technical Info menu. |
| Step 5 | Remove the Nest from the base by pulling it straight out. |
Checking the Battery Level
Once you’ve removed the Nest thermostat from the base, you can check the battery level. Here are a few ways to do it:
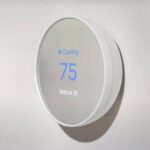
- On the Nest display: If the battery is running low, it will usually say something to that effect on the screen. Look for a warning message or low battery icon.
- Through the Nest app: Open the Nest app on your phone or tablet and select your thermostat. The battery level should be displayed on the main screen.
- In the Technical Info menu: Follow the steps outlined above to access the Power section of the Technical Info menu. The battery level will be displayed here.
It’s a good idea to check the battery level on your Nest thermostat regularly to ensure that it’s always functioning properly. If the battery is running low, you can either replace the batteries or charge the Nest using the USB port on the back of the thermostat.
Key Takeaways
Charging your Nest thermostat is a simple process that can be done easily at home. Here are the key takeaways from this article:
- You can charge your Nest thermostat using the USB port on the back of the device.
- Make sure you have the necessary tools, including a USB cable and a power source.
- Remove the thermostat from the wall and connect the USB cable to the device.
- Charge the thermostat until the battery is full, which may take up to 2 hours.
- Once the battery is charged, reconnect the device to the wall and turn on the power.
By following these simple steps, you can ensure that your Nest thermostat is always charged and ready to use. Remember to check the battery level regularly to avoid any unexpected shutdowns or malfunctions.
With proper care and maintenance, your Nest thermostat can provide reliable and efficient temperature control for years to come.